345 | Boost Control Trouble Shooting
Summary
Problems with the boost control system are some of the most common issues we come across when tuning turbocharged engines. In this webinar we’ll cover the 4 most common issues I’ve seen in my career and also cover an approach to tuning these engines that will avoid the potential for engine damage if something isn’t correct.
| 00:00 | - Hey team, Andre from High Performance Academy, welcome to another one of our webinars. |
| 00:03 | This time we're going to be diving into some of the more common boost control issues that I've seen crop up when it comes to tuning turbocharged engines. |
| 00:13 | And there are a lot of these and most of them are relatively straightforward, relatively easy to solve but nonetheless out of every 5 turbocharged cars that I saw come across my dyno when I was tuning commercially for a living, I would say that 4 of them would have some sort of issue that needed to be resolved and again most of these are really straightforward and really shouldn't occur in the first place. |
| 00:40 | So I'm going to give you a bit of a rundown on these issues and then we'll also talk about some of the things you should be doing, some precautions I guess you could say, that you should be taking when you're approaching tuning these vehicles so that if you do find part way through the tuning that there is an issue with the boost control, you're able to resolve it quickly and without risking damage to the engine. |
| 01:02 | As usual we're going to have questions and answers at the end of the webinar so if you've got anything that I talk about today that you'd like a bit more info on or anything really related to the topic, we will keep it solely to boost control, then please feel free to ask those questions in the chat and we'll get to those at the end. |
| 01:21 | Now if we jump across to my laptop screen, this RX7 that I've had on the dyno this week is actually sort of the impetus for today's lesson because it came in for a tune and we found straight away that it had boost control issues. |
| 01:37 | So no big surprise there, sometimes I sort of half expect that that's going to be the case. |
| 01:42 | But it sort of was enough to spur me into thinking that yeah we could probably share some of this information and hopefully it's going to be helpful for those out there who are tuning either their own vehicles or maybe you are running a tuning shop and you're tuning turbocharged engines for customers. |
| 02:01 | So there are 4 main areas that I see issues with our boost control and we'll go through them one at a time. |
| 02:08 | The first is where we actually a mechanical issue. |
| 02:12 | I'd say that this is reasonably rare although it can happen. |
| 02:19 | This would be wastegate sizing for a start so what we have here is maybe a wastegate that's physically just a little bit too small for the job and how that's going to show up is in boost control that sort of spirals out of control, starts going exponential as we move further through the run. |
| 02:38 | So let's just head across to my laptop screen, I'll apologise in advance for my poor artwork but I'm sure we'll get the jist of it so if we sort of do a plot of boost on our vertical axis vs RPM on our horizontal axis, what we sort of really want to see is something that's going to go a little bit like this, our boost sort of comes up where we get to our boost threshold and it sort of meanders along hopefully reasonably flat. |
| 03:04 | So that's typically what I'm trying to achieve but there's also some reasons why we may want to actually be dropping the boost off or raising it up, a flat boost curve is not always the be all and end all. |
| 03:16 | However when we've got a mechanical issue where the wastegate is too small, what we're going to see is initially a curve that looks very similar to this but as we get higher in the rev range where there's more exhaust gas energy we're going to see the boost start to do something like this. |
| 03:31 | And assuming, which we'll get to in a moment, assuming that this isn't being artificially created by problems with the boost control system, then this is indicative straight away that we've got a problem with either our wastegate sizing, wastegate that's too small, or alternatively a problem where the wastegate location is not ideal. |
| 03:55 | Now what we need to understand about wastegate location is that exhaust gas is super lazy, it doesn't really like changing direction so we need to really take that into account when we're designing the exhaust manifold and more specifically how the wastegate is actually taken off the exhaust manifold and collector. |
| 04:15 | So let's just head across to my laptop screen. |
| 04:19 | I've only got a couple of photos here and they're not the best but we'll explain it and hopefully it'll give you a good understanding anyway. |
| 04:26 | It's not an overly complex topic to understand. |
| 04:28 | This is a shot of the exhaust manifold and turbo on our Toyota 86 racecar so obviously everything is covered in header shield but basically we have in here our 4 into 1 collector and then we can see here we've got our wastegate coming off that. |
| 04:46 | It's not perfect because we've got kind of a really sharp abrupt angle there, we've sort of got this 90°. |
| 04:52 | In the perfect world which we can't really achieve here, what we'd actually want to do is sort of have that wastegate coming off in the same direction that the exhaust gas is flowing and that means when the wastegate's open, it's super easy for the exhaust gas just to divert and head out the wastegate. |
| 05:08 | Worst case scenario is where instead of what we've got here, we actually have the wastegate coming back down off the manifold at an angle of sort of maybe 100, 120°+. |
| 05:22 | Now in this situation, what has to happen for the exhaust gas to get out is it's all going up here, it's got a lot of exhaust gas energy, a lot of inertia and what it has to do is kind of this abrupt around about turn and head out the wastegate. |
| 05:39 | It doesn't like doing that and that's where again we're going to start seeing the exhaust, sorry the boost pressure, let's get the words right here, the boost pressure start to sort of go exponential as we get higher in the RPM range. |
| 05:52 | Now I've got another photo here which again this is slightly compromised, but worked OK for our situation, this is actually the exhaust manifold off my old Evo 3 drag car, it was built by Jono at Performance Metalworks many many years ago and this held a HKS T51R SPL ball bearing turbo, bit of a mouthful. |
| 06:14 | We also used a HKS 60mm wastegate but you can see here we've got this nice 4 into 1 collector here, obviously we can only see 2 of them. |
| 06:22 | And then the wastegate comes off again, much like the SR20 at 90°, not perfect but again it did work, particularly given that we were trying to run quite high boost pressure, 50 psi+ in that example. |
| 06:35 | Again the better solution would have been if we could have had that turbo, sorry wastegate sort of come off again in the direction of flow. |
| 06:44 | So this is something to look out for, that's kind of the hint is where you start to see that exponential boost curve as you get higher in the RPM range and unfortunately if that is the situation, there's no easy fix there, it's going to actually require some fabrication work in order to fix. |
| 07:02 | Another example that I have seen, pretty rare these days and I think the aftermarket kind of figured out most of these issues and we're seeing a lot better product in terms of turbo kits than what I saw 15+ years ago at the start of my career, let's be honest, probably 20+ years ago now. |
| 07:21 | But I did see the occasional turbo manifold which had the wastegate coming off a single runner, now that's just unfortunately never going to work particularly well so a few red flags there to look for. |
| 07:35 | In terms of mechanical issues, another one that I want to mention here and fortunately this one should be relatively easy to fix, but if we jump to our overhead here, I've got the Turbosmart wastegate here off our Toyota 86 and you can see by the colour of the cap which used to be black, it has in fact seen a fair amount of heat there. |
| 07:59 | One of the downsides unfortunately with anodising is that it does tend to discolour when it gets hot and wastegates do get hot. |
| 08:08 | So the part that is important to understand here is when we look at the underside here, we've got the valve. |
| 08:16 | So this opens and closes in order to control the flow through the wastegate so no real rocket science here. |
| 08:23 | The part that's important and often overlooked is this little guy here. |
| 08:28 | So this is the wastegate seat, so this actually, this surface here you can actually see a bit of a shiny line around it, as I turn it, that's actually where the wastegate has been sealing. |
| 08:40 | So when we unpack our wastegate, when it's just arrived, we're going to find that that seat is separated from the wastegate, or at least in the Turbosmart product and I've seen this mistake made with a range of different wastegates and it's very easy if you don't know how this all goes together to assemble the wastegate onto your exhaust manifold and forget to put the seat in there. |
| 09:02 | The problem with that, if we turn this over again, little hard to see but we actually don't have the wastegate sealing against anything, it's leaking the whole time. |
| 09:11 | So what that's going to result in is super lethargic boost response. |
| 09:16 | So let's head back across and I'll draw another pretty little picture, at least I'll try. |
| 09:22 | So if we kind of replicate what I had before, this comes down to also having at least an expectation in mind of where the turbo should be making boost. |
| 09:32 | So what we're probably going to see with something like this is a boost curve that kind of looks a little bit like this. |
| 09:40 | It will finally actually reach boost, the target boost or the wastegate spring pressure boost but it's going to be very very late whereas let's say potentially the turbocharger, all things being equal with the seat in, we should have seen a boost curve that maybe looks something more like that. |
| 09:56 | Again please excuse my terrible drawing but hopefully you're picking up what we're putting down here. |
| 10:02 | So if you've got really really lazy boost response, it's always something to look for. |
| 10:06 | Now a little tip, and this is something I use quite frequently, it's difficult, well it's actually impossible to do if you've got the wastegate integrated back into the exhaust system but if you have a wastegate that has a separate dump pipe or screamer pipe, a good test for this is that you'll actually be able to hear audibly at idle, exhaust gas leaking through because the wastegate isn't sealing so not very difficult at all. |
| 10:31 | Another thing I used to do occasionally as well if I just wanted to test the wastegate function and where it's opening is I'd just put a piece of race tape across the outlet from that wastegate dump pipe and of course as soon as the wastegate opens, it's going to blow that tape off so this gives you a very quick visual cue of what the wastegate is doing. |
| 10:50 | Obviously the amount it's opening specifically you're not going to see but it'll give you a very broad idea. |
| 10:57 | On that note, although sort of a little bit off our topic today, if we jump across to my overhead again you can see here this is a wastegate position sensor which Turbosmart now offer, really easy to install and that's going to give you all of the detail you need on exactly what the wastegate's doing, if you want to get really granular with its performance. |
| 11:18 | So there's our first issue, mechanical, so generally wastegate sizing is too small, poor take off of the wastegate from the manifold or someone's just left out the seat. |
| 11:30 | If we're talking about issues with internal wastegates, obviously this is external, there are separate issues with internal wastegates, a really common issue that I see with those which causes lethargic boost control, you'll often hear it rattling at idle, is where there's insufficient pre load on the wastegate. |
| 11:47 | So some are adjustable to take that pre load out, often the clevis that goes over the wastegate arm itself will be threaded so you can back off the nut, wind a couple of more turns of pre load onto that and that will help improve your boost response. |
| 12:04 | Alright we'll move onto boost control plumbing and this is the one that should absolutely be avoidable but it's just not. |
| 12:11 | Time and time again I see cars come through, built by other workshops or built by enthusiasts and the boost control plumbing is incorrect. |
| 12:22 | So again we'll jump to our overhead. |
| 12:25 | This is a Turbosmart boost control solenoid but the reality is that this is a generic MAC solenoid. |
| 12:32 | This one is actually 4 port which I would not really recommend except for some very very specific applications but obviously 4 port, it's got 4 ports on it. |
| 12:46 | Does exactly what it says on the label. |
| 12:48 | Normally what we're using is the MAC 3 port solenoid although there are a few specific different brands. |
| 12:54 | Essentially they're all doing the same thing and with those 3 port solenoids we generally have 3 ports labelled common and that means that it's connected all the time, normally open and normally closed and by providing a pulse width modulated signal, we can then vary the boost control. |
| 13:12 | I think some of the confusion comes in here because the way we plumb a 3 port solenoid will differ depending on whether we're connecting it to an internal wastegate, an internal wastegate with 2 ports on it, one above and below the diaphragm or to an external wastegate like our Turbosmart one that I've just shown you. |
| 13:32 | The reality is, the solution to this is to just read the manual, it is absolutely not difficult. |
| 13:38 | Most ECU help files will have information on how to correctly plumb both an internal or an external wastegate. |
| 13:46 | Likewise just jump onto Turbosmart's website, they've got very detailed instructions with some really really nice pretty pictures that essentially if you just do what it says in the manual, you absolutely cannot go wrong. |
| 13:59 | So that's one that really frustrates me because it's so easy to avoid, there should be no excuses for this but it is one of the things that I see all of the time. |
| 14:10 | Then we have boost control setup. |
| 14:14 | So this would be where we've got a system mechanically and physically that should be able to support what we're trying to do but when we actually run the car on the dyno, the boost is just out of control so this could be setup in terms of our wastegate duty cycle tables are improperly tuned, maybe some of the base parameters like our wastegate solenoid duty cycle, sorry frequency are set incorrectly so there's a range of things that can trip us up here. |
| 14:44 | For a bit of an example of this, let's just head across here to a Link G4+ ECU and what we're looking at at the moment is auxiliary 1 output which is the output for our boost control solenoid and the option we have to adjust here is the frequency that the solenoid will operate at. |
| 15:02 | You can't get yourself into too much trouble here because essentially if you go to a frequency that's too high, the solenoid just can't support it and it won't work and we'll get no boost control which typically is going to mean that we run on the wastegate spring pressure or the minimum boost that the wastegate can support. |
| 15:21 | So what is the correct frequency? Well there isn't a specific frequency that you can say across the board is correct. |
| 15:28 | Generally with the MAC 3 port solenoids I find that frequencies between about 15 and 30 Hz are about right. |
| 15:36 | So that's one thing we want to check. |
| 15:38 | We also want to physically do an output test if the ECU supports that and make sure that we can physically hear that little solenoid clicking. |
| 15:47 | And if you can do an output test like that, it's really easy to see at what point the solenoid can no longer respond to the frequency. |
| 15:55 | So for example if I took this solenoid and I tried setting the frequency up to maybe 100 Hz and then did a test output, you won't hear it do anything because it just physically can't operate at such a high frequency so that's a very very easy test. |
| 16:11 | Then we get into some of the more intricacies which it gets a little bit beyond our topic today of open loop vs closed loop control and how we go about tuning the closed loop control and the PID control algorithm but essentially in a nutshell, boost control setup inside of the ECU, that can be an issue. |
| 16:31 | The last common cause of issue that I see is component failure. |
| 16:36 | We'd like to think that this isn't going to be an issue on a freshly built project but this actually spurred the whole webinar today and the reason for that is if we get to our overhead here, admittedly it is a little bit difficult to see. |
| 16:49 | This is 2 sections of the hose that ran under the 13b exhaust manifold to the rear wastegate and again I'm sorry it is a little bit difficult to see, it's actually melted a hole right through this section and while I was trying to fault find this, the hose is so brittle that it actually cracked into 2 pieces while I was trying to remove it. |
| 17:12 | Now couple of problems here, first of all, in the ideal world I don't really like using this product for boost control plumbing. |
| 17:22 | This is the sort of connections we see a lot in industrial pneumatic control systems. |
| 17:27 | It is reasonably easy to work with, nice little push lock fittings that are easy to put into our wastegate. |
| 17:33 | The problem with it is because it is just plastic, it is not very good at handling high temperatures. |
| 17:40 | And rotaries and exhaust systems in general put out a lot of heat so at a bare minimum, this really needed to be shielded heavily from heat but ideally I would probably prefer to use a different product, maybe a braided PTFE style hose which again is absolutely not impervious to heat but it is a superior product, albeit a more expensive one. |
| 18:07 | So this resulted in essentially uncontrolled boost in the FD RX7 as soon as I started tuning it. |
| 18:13 | So we go fault finding and straight away just taking that hose off at the boost control solenoid and blowing into it, there was no resistance, I could hear that the air was just leaking out so straight away I know that's the sort of issue that I'm looking for and it wasn't too difficult to go a bit deeper and find the actual root cause of the problem. |
| 18:34 | The other issue that I've seen and it is reasonably rare is where a diaphragm in the wastegate has actually torn or been otherwise damaged. |
| 18:46 | So I can't open this up but again we'll get our wastegate under our overhead here. |
| 18:52 | Where we've got this threaded collar which we use for removing at the top of the wastegate to change springs, we have a silicon, actually I assume it's a silicon material, diaphragm inside of here that the air pressure works on both above and below. |
| 19:09 | That obviously is not necessarily going to last forever, particularly if it is exposed to extreme temperature and a tear in that diaphragm can straight away result in a lack of boost control because the wastegate's no longer going to open so that's something to look out for if you've just got the boost spiralling straight up to the maximum. |
| 19:30 | So again let me just sort of show you, there's subtle differences here. |
| 19:35 | Again we'll draw some nice little pretty pictures. |
| 19:38 | If we've got something like that, what we're going to generally see is our boost curve's going to go just like that, it'll never try and control it all because the wastegate physically just isn't opening so subtle but important difference to where the wastegate sizing or the way the wastegate's taken off the manifold is incorrect. |
| 19:59 | Alright so those are our key areas, remember if you've got any questions on that, we'll jump into a Q&A shortly, those are the key areas where we do have issues. |
| 20:08 | I'm going to go into the tuning process now and just talk through some of the safeguards that I like to put in place in the approach that I take to basically make sure that I'm putting as little stress on the engine as possible, particularly if we have an issue with our boost control. |
| 20:26 | So the very first place to start with this is to make sure that we have a boost cut set up. |
| 20:33 | So again, I mean not rocket science but let's just head across to our Link computer here, our G4+ in this case software and if we go in this case to MAP limit, this is where we set this up. |
| 20:47 | So first of all we want to make sure that our MAP limit is set up sensibly. |
| 20:51 | One of the things we do want to keep in mind here as well is the limiter mode. |
| 20:55 | So whether it's an ignition cut, or fuel cut. |
| 20:58 | Link, because rotary engines are quite sensitive to the type of cut, it is quite easy to damage a factory seal with an aggressive cut, they actually have a rotary only mode. |
| 21:10 | I don't actually know exactly what they're doing with this but it is a subtle blend of fuel and ignition cutting as I understand it. |
| 21:17 | So we've got our cut is set up and then what we want to do is also check what we've set our MAP limit to. |
| 21:25 | I don't get too granular with this, we can see at the moment we've got a 2D table vs engine coolant temperature and fine maybe you want to limit the boost when the engine is cold but irrespective just for the dyno, particularly when we're just getting started, what we want to do is just put some numbers in here that are going to be safe and generally what I want to do is choose a boost cut that's going to be a little bit higher than what the wastegate spring pressure is so let's say our wastegate is set up with a 10 psi spring, I might choose to start with a really conservative cut at maybe 13, 12, 13 psi. |
| 22:01 | What this should mean is that everything's working correctly, we should come up and control and open our wastegate at around about 12 psi. |
| 22:09 | Just a point here that the spring pressure rating does not always necessarily specifically equal the boost you're going to get. |
| 22:19 | A lot of this also comes down to turbo sizing because back pressure which is very related to our turbo sizing is also forcing the wastegate open so a tight small turbocharger that results in very high exhaust back pressure will actually open the wastegate prematurely. |
| 22:35 | So at a lower pressure than what our wastegate spring would suggest and vice versa with a really big turbocharger, we can end up with a little bit more boost. |
| 22:44 | So it's only really a guideline but I would start by doing that. |
| 22:48 | So let's say in this case, let's say we want to go to maybe 180 kPa or something of that nature so now we know that we've got that cut set up and if we do get that situation where our boost really quickly ramps up and spirals out of control quicker than we can respond to it, we know that the ECU is going to safeguard our engine and prevent any damage. |
| 23:11 | The next step is despite the fact we've got electronic boost control that our ECU is in control of, we actually want to start by disabling that electronic control. |
| 23:22 | And this kind of avoids straight away the pitfall of a potential setup issue with our ECU. |
| 23:28 | It takes away our open loop and closed loop tables, our PID gains, all of that are off the table, we're just back to a simple mechanical system so this allows us to test 2 things. |
| 23:39 | First of all it's going to give us a chance to ensure that the boost control plumbing is correct and I mean realistically I would recommend if you're tuning cars for others, to always actually check over and make sure that boost control plumbing is correct before you get started but I know most tuners probably aren't going to do that, they're going to let the first dyno ramp run with an overboost actually show that problem for them but there you go, that's what you should be doing. |
| 24:05 | So once we've done that, or how we can do that, we can disable the boost control electronically in the ECU or alternatively a really simple way of doing that is just to temporarily unplug our boost control solenoid and that's going to achieve the same thing. |
| 24:23 | Now as I said, this is going to allow us to ensure that we don't have any problems with our boost control, our electronic boost control strategy but just as importantly, maybe more importantly, it allows us to see what the mechanical system is like in terms of controlling boost and this can highlight straight away some of those issues with the wastegate not controlling boost and we get that exponential increase or the really slow lethargic boost control if we don't have a seat in the wastegate. |
| 24:55 | Really important though because if our base mechanical boost control is poor then we're really going to be fighting an uphill battle to get good stable boost control electronically so the electronic system isn't a magic fix or it's not a silver bullet for a mechanical system that is just not set up correctly. |
| 25:17 | So again like if we just draw our little picture here, if we've got something that is doing let's say this. |
| 25:31 | That's probably pretty good, this is what we'd expect from probably a factory turbo sizing. |
| 25:36 | Maybe it'll come up a little bit earlier in the rev range but you kind of get the idea. |
| 25:40 | Generally what we're going to see is that with a factory turbocharger, they're sized for response not top end performance so almost inevitably when I start to see that boost just taper away at a higher rev range. |
| 25:52 | Not necessarily indicative of a problem, that's just what we see with most factory turbocharged cars. |
| 25:57 | And to a degree, once we bring in electronic control, we can hope to achieve 2 things. |
| 26:02 | One is we might be able to hold our boost a little bit higher in the higher rev range. |
| 26:07 | We might still not be able to fix all of that tapering, it's really again depending on the turbo and sometimes depending on the factory system we might also see that we can actually bring the boost in a little bit earlier but whether you can achieve that is very dependent on what you're actually working with. |
| 26:23 | On the other hand if we start to see something that's sort of really really ugly, so we've got the boost sort of coming up and we're starting to see these weird oscillations or that exponential shape, it's going to be difficult to get a really solid result there just using electronic control. |
| 26:42 | Chances are there's a mechanical problem in the system that you really need to address first and foremost. |
| 26:49 | So at this point, we've run the car up and we've got our boost control working or our mechanical system is working and we know that everything's kind of there or there abouts where we want it to be so it's safe and we now can enable our closed loop boost control. |
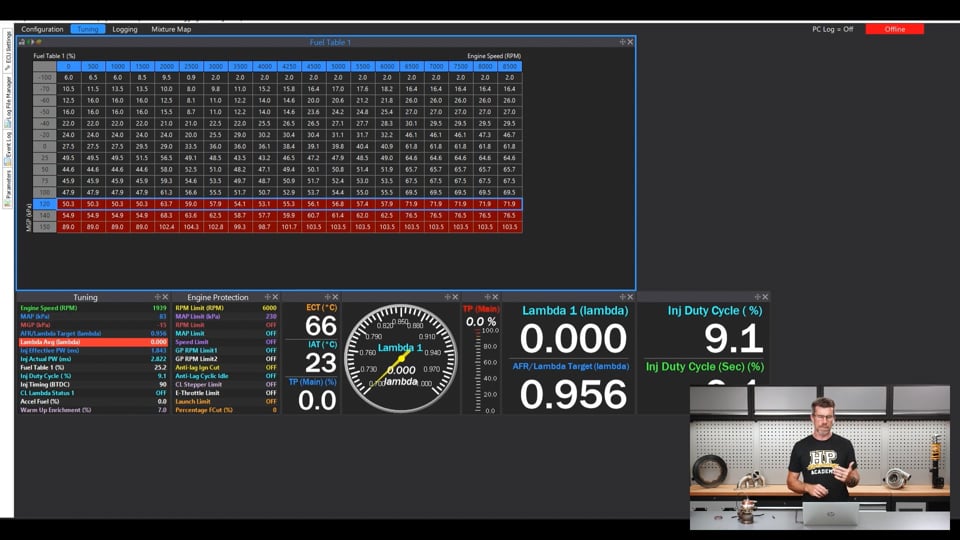
| 27:06 | So when we do this, I always recommend starting with open loop and for those who don't quite know the difference between open loop and closed loop, open loop means that the ECU is just blindly sending out the numbers from our wastegate duty cycle table so let's again head across to our G4X here and we can look at our wastegate duty cycle table. |
| 27:29 | I'm sure we can look at our wastegate duty cycle table. |
| 27:34 | Let's just try finding that, showing how long it's been since I've worked through our Link G4, boost setup, there we go, we've turned it off, that's why. |
| 27:44 | Let's turn it into open loop so again that's where we want to start, in this case I'll say no I don't want to zero the tables. |
| 27:50 | But let's have a look at our table here, wastegate duty cycle. |
| 27:56 | Right so it is 0, perfect. |
| 27:59 | Basically this is a simple 2D table and let's say that this just had numbers of 35% everywhere. |
| 28:09 | 35% everywhere, not playing the game for me today. |
| 28:13 | So this is going to output a duty cycle of 35% to our wastegate solenoid irrespective of what the actual boost is doing so let's say we want 15 psi and we've got 10 or alternatively we've got 30, the ECU's still going to send that same signal out to the boost control solenoid irrespective so it's not going to try and correct any errors so that's open loop control. |
| 28:37 | Flipside of that is closed loop control, it's going to be trying to target what we want. |
| 28:42 | So let's say again we want maybe 20 psi. |
| 28:45 | If the boost is a little bit low, maybe it's 17 psi, it's going to increase the duty cycle to the solenoid in order to try and drive us towards our target or of course vice versa if we're above our target. |
| 28:56 | With closed loop control, the reason that we want to start in open loop is that closed loop control still starts with our base duty cycle and then we've also got our proportional, integral and derivative gains trying to basically control how it responds to that error. |
| 29:13 | Now why I say we want to start in open loop is that to get good closed loop control, we still need our base duty cycle to be set up perfectly or at least as close to perfectly as we can so that we're really really close to our target boost and that means the closed loop system doesn't need to do much work which in turn means that it can do a better job of getting us onto our target so we always want to start in open loop and we want to start, again jumping across to my laptop screen, by zeroing out that table that was already zeros, again meaning that as we start our tuning we should find that we are still getting the same boost result that we got when we had our system disconnected so base spring pressure that our wastegate is giving. |
| 30:00 | So what we're going to do, we're going to then start increasing our boost because at this point we should have our base run with just our pneumatic control of the wastegate and we're going to start by increasing our duty cycle, how are we going to do this? Well what we want to do is start in small increments. |
| 30:18 | However there is a but here. |
| 30:20 | Quite a lot of people start, again we'll jump to my laptop screen, by putting a number of 5% and do a run. |
| 30:25 | Obviously a small increase so we shouldn't be over boosting, should be nice and safe. |
| 30:30 | The problem is often you're going to find that that will actually make zero difference, it's not going to have any effect at all so you sort of go up to 10% and probably at 10%, again you'll see almost no change, maybe no change at all but if there is a change it'll be very minor so at this point you're sort of thinking well I just made a 10% change and I only went up maybe 1 psi so if I want to go 5 psi, I'm probably going to have to go 30 or 40 or something of that nature. |
| 30:57 | And the problem here is that all of these little solenoids have what's referred to as a deadband so between 0 and about 8-12% duty cycle, they essentially are doing the same as 0%, nothing, they have the exact same issue at the top end of their range so once you go above about 90% duty cycle in these, maybe 88 to 92%, it's exactly the same as having a number of 100% so they aren't perfectly linear in their operation and this is something that a lot of tuners do not understand so it can kind of falsely affect what you feel is a suitable jump in duty cycle in order to get to your target. |
| 31:39 | So how do we approach that? Well again I'd start probably conservative with maybe 5 or 8% but knowing that I'm probably not going to see any real change until I get up around that 10% mark. |
| 31:52 | Tip with this as well, you don't have to complete a full ramp run on the dyno out to the rev limiter as you're doing this. |
| 31:58 | If I put in a number of 5, did a ramp run to the point where the boost actually comes up and starts controlling and it's overlaid directly on top of the last run with no electronic control, I'm just going to abort that run, back out of it and go again so I might then jump it up to 10%. |
| 32:15 | In essence though, once we find that point where we're starting to get control then I'm still going to move in smaller increments so from here let's say we start to get a little bit of increase in our boost, we've gone 10%, maybe I'll go 12 or 14% for my next jump so really small increments and this becomes an iterative process so remembering that every time we increase the boost, what's going to happen is that's going to affect the airflow through the engine which in turn is going to affect its fuel requirements which in turn is also going to affect its ignition requirements so it becomes an iterative process of dialling our fuel and ignition in at the existing boost pressure then increasing the boost pressure and then reoptimising our fuel and our ignition at that next boost. |
| 33:01 | So then we can go again. |
| 33:03 | But we want to be smart about this and really learn from what the engine is trying to tell us. |
| 33:10 | So what I mean by this is let's go to a fuel map here and let's say we are at 100 kPa here, let's say we then move up and generally I probably wouldn't want to have a jump to 125 so let's just fix that. |
| 33:26 | Let's say we've got 20 kPa increments, that'll do for the moment. |
| 33:33 | OK let's say we've got our 20 kPa increments so what I'd do, let's say we've run the engine through at 100 kPa, we've optimised our fuelling and we've optimised our ignition. |
| 33:42 | What I'd probably try and do before I sort of go too far with getting the fuelling really nicely optimised is make my next jump in boost a 20 kPa jump, the reason being that then we're going to be running right through the centre of our next row, 120 kPa. |
| 33:57 | If on the other hand we sort of increase the boost and we get up to 108 or 112 kPa, we're in the sort of awkward situation where we're actually interpolating between those two rows, we can't really do a good job of tuning it because we know that the 100 kPa row is correct, just tuned that but we aren't up to 120 kPa so we can't actually optimise that one. |
| 34:23 | So that's a good tip with our boost steps is sort of 20 kPa increments is a good jump. |
| 34:28 | Maybe once you sort of get to the limit you can dull that down a little bit and go in maybe 10 kPa steps but it allows us to get to the centre of the next row and allows us to do a good job of tuning that. |
| 34:39 | However the other, obviously the same goes for our ignition, I'm just showing the fuelling here. |
| 34:45 | The same goes for that but also what we want to do is sort of take note of the step change that we see. |
| 34:51 | So let's just say for example here the number at 100 kPa and 5000 RPM, let's say that that was let's just call it 55 to make it nice and round, and then once we get up to 120 kPa, let's say that we find that the number to get our fuelling onto our target is 57%. |
| 35:10 | OK we've stepped up 2% for 20 kPa. |
| 35:15 | Now once we've got everything dialled in at 120 kPa, I can take note of that and sort of extrapolate that out into this next row which is 140 kPa and go well we've gone up 2%, probably there's a good chance that the next row is going to want another 2% and let's go a little bit safer than that so 57 plus 2, obviously 59, maybe we want to go 60 or even 62% to start with so we always ideally want to start with our mixture a little bit rich, a little bit fat and then we can lean it out. |
| 35:49 | It's never desirable to start lean and then add fuel, particularly as we sort of go up in our load and RPM. |
| 35:57 | So we can sort of just use the general trends that we're seeing to help us optimise the tune. |
| 36:02 | I'm going to go into questions and answers really shortly so this is a reminder if you've got any, please get those questions into the chat now, but we aren't quite done. |
| 36:10 | So again exactly what I've just shown you there, also goes for our ignition timing as well so we can sort of tune ahead and it just should mean that A, when we get into that next untuned zone, we're safer and B, it should actually speed up our tuning process and ideally I don't want to spend any more time with the engine under high load, high boost, high RPM than it absolutely needs to so if I can tune that row in 2 or 3 ramp runs on the dyno instead of 5 or even 10, then great, I'm all for that. |
| 36:44 | So once we've got all of that done and we've got our boost control set up in open loop mode, that's when we can then transfer to closed loop and start tuning some of those parameters. |
| 36:56 | As I mentioned, a little bit above and beyond the scope of today's webinar. |
| 37:00 | If you do want to learn more about that we do have our boost control tuning course and it goes into a lot more detail, particularly around optimising the proportional, integral and derivative gains. |
| 37:12 | Now we've looked at Link so far, I mean every ECU obviously does this, they've all got their own slight differences in how they go about it. |
| 37:19 | Once thing I just wanted to show you is on the MoTeC M1, so this is for the Toyota 86 that we race with a turbocharged Nissan SR20VE engine. |
| 37:31 | Now there's a lot of stuff going on here, it is a reasonably complex ECU. |
| 37:36 | One of the things I wanted to show here on this though is under our solenoid here, so this is the boost control solenoid of course, so we've got some simple things here such as what output on the ECU it's connected to and then interestingly here, MoTeC actually allow us to set the minimum and maximum duty cycles that the ECU can apply to the solenoid and you'll see that's 10% and 90% and the reason for that is that setting this means that we are always working in the linear operating range of that solenoid, it avoids that non linear operating area in the bottom and the top that I just talked about, meaning that now when we put in a number of 0% in our duty cycle table, that is actually going to be 10 and if we put in a number of 100% in our duty cycle table it's actually 90. |
| 38:28 | So what that means is that we should get nice even steps in our boost, relatively speaking, for a change in our duty cycle, gets around that weirdness at the bottom end and the top end that can trip you up. |
| 38:41 | In terms of the other elements with this here, if we just come up to our aim main, so this is just as you'd expect, our boost target, got a 3D table here of boost vs throttle position. |
| 38:53 | Again a little off topic but it's really important in my opinion with turbocharged cars to actually control the boost relative to the driver's pedal position because turbocharged engines are just so good at making boost that once you're actually at peak boost and 100% throttle, you can sometimes have to pull the throttle all the way back to maybe 40 or 50% to get a sizeable reduction in boost and what that means is we've got a very non linear relationship between driver's pedal position and the torque the engine is producing so that's why I've got throttle position in there. |
| 39:25 | The next table that that works in conjunction with is, we'll come down to our feed forward which is a bit of a strange term in the aftermarket ECU world, this sorrt of comes more from industrial applications of control systems but feed forward, let's just call it base duty cycle which I think a lot of people would understand. |
| 39:43 | And this table here takes on our X axis, our boost aim, so that comes from that previous aim table that we're looking at, obviously vs our engine speed on our horizontal axis and then this is just the Z number here, this is just the duty cycle, base duty cycle that is going to be output. |
| 40:00 | The more time we spend dialling this table in so that we are as close to our boost target as possible, the better result we're going to get once we enable the closed loop control. |
| 40:12 | MoTeC do an exceptional job of the closed loop control and generally on track I'll be within maybe +/- 1-2 kPa of my target which is exceptionally tight control. |
| 40:25 | But it is a case of garbage in, garbage out, it's only going to be able to do as good a job as the base tune that is put into it. |
| 40:32 | So that brings us to the end of our webinar, hopefully I've covered those key topics and given you a little bit more insight. |
| 40:39 | I'll jump across to my notes now, we'll have a look at our questions and see what we've got in there. |
| 40:47 | In here maybe, there we go, really having trouble with the technical elements today. |
| 40:52 | How do you properly size a wastegate? That is the million dollar question actually, it is a little bit tricky because it's not a straightforward answer to give. |
| 41:06 | The reason for this is that the sizing of the wastegate is going to depend on the turbo sizing, the engine sizing and also it's going to depend on the boost pressure that we want to achieve. |
| 41:18 | So for example if we're tuning a drag engine where we're going to be wanting to run 60 or 80 psi of boost then we don't really need to be bypassing much exhaust gas energy around that turbocharger at all, meaning that we can actually get away with a smaller wastegate compared to if we're running that exact same engine and turbo combination but we wanted to maybe control the boost down to sort of 10 or 12 psi. |
| 41:44 | The reality of this is because it is quite complicated and it is a case by case basis, you are probably best to run this past the wastegate supplier that you're thinking of using. |
| 41:55 | For example if you go to Turbosmart and say I'm running a 4G63 with a Garrett GTX3076R Gen 2 and I'm trying to achieve this, that's a pretty common combination, they're going to be able to give you a recommendation on wastegate sizing that's going to be suitable for that application. |
| 42:18 | Generally, word of advice, I see less issues with a wastegate that is bigger than it needs to be compared to a wastegate that is smaller than it needs to be. |
| 42:29 | While we are actually on that topic as well, this is something that came up a lot when I was running my old workshop, we'd have customers come in and they'd have a wastegate fitted to their car and they want to buy a different spring for it to change the boost and yes that is a way of changing the boost pressure but in my opinion, probably not the best way. |
| 42:51 | The reason being that if we just changed the spring in the wastegate, that is going to change the boost pressure yes, but we still have no control over it so we're then stuck with whatever we've got. |
| 43:03 | The better approach is this electronic control which is really what we've been talking about for this whole webinar and then what we want to do is size the wastegate spring or choose the wastegate spring based on essentially the minimum boost pressure that we're going to want to run and this really comes down to how much power and torque we want out of the engine at a minimum, maybe you want to consider what the engine's going to be like or how much traction you're going to have in wet conditions and size accordingly. |
| 43:30 | And then from there you can then use our electronic control to increase the boost pressure to your desired high target. |
| 43:38 | Now there's no free lunches here, there isn't an infinite range that we can adjust the boost pressure because as I mentioned earlier, we've got the back pressure in the turbo system trying to push that wastegate open and at some point that becomes enough that irrespective of how much pressure we're applying to the top of the wastegate to try and keep it closed, that back pressure's going to overcome the spring and force it open. |
| 44:02 | So let's say if we put a 10 psi spring in our wastegate, again this is just very broad, there's too many variables to be specific here. |
| 44:12 | With our wastegate solenoid maxed out at 100% duty cycle we might be able to get from 10 psi to maybe 24, maybe 26, maybe only 18 but you're not going to be able to go from 10 to 30 or 10 to 40, that is why we quite often see in drag applications the use of CO2 boost control where we're regulating the CO2 to maybe 80 or 100 psi. |
| 44:38 | That gives us a lot more control over the wastegate and then the alternative, I did say I'd come back to this guy, the 4 port solenoid, this gives us more range of control with a softer spring but there's no free lunches with these either. |
| 44:54 | I don't particularly like them, the reason being is that they offer much less resolution in our tuning and what I mean by that is when we make an increase of 1% duty cycle to our boost control, you're going to see a larger jump in our boost with a 4 port vs a traditional 3 port. |
| 45:12 | So it can be difficult to get really fine accurate boost control and we quite often see this oscillation around our set point when we're using a 4 port. |
| 45:22 | Question from Nismo Freak who's asked, do you often find that when picking a wastegate spring rate, the actual base pressure in practice is usually higher than the spring rates? E.g. throw a 10 psi spring and you end up with 15? Yeah I did touch on that. |
| 45:35 | 10 to 15 is quite a jump but it isn't a rock solid guarantee that you're going to get what the spring actually says. |
| 45:45 | It's only going to be a ballpark because it is so affected by the amount of back pressure that's sort of also helping to force that wastegate open so as I mentioned earlier, if you've got a really small turbocharger resulting in high back pressure, that's going to help the spring and force the wastegate open and that can result in less boost pressure than the spring would suggest and conversely, the situation you're in, if you've got a more free flowing turbocharger with less back pressure, there's less force trying to push that wastegate open and you're likely to see more boost than the spring would suggest. |
| 46:21 | Alright looks like that's all of the questions we've got so we will leave it there. |
| 46:25 | As usual, for our HPA gold members, if you are watching this at a later point in the archive and you've got questions, please ask those in the forum and I'll be happy to answer them there. |
| 46:35 | Thanks for watching and we'll see you all next time. |
Timestamps
0:00 - Introduction
2:01 - Wastegate sizing
3:49 - Wastegate location
7:35 - Missing wastegate seat
11:30 - Insufficient pre load
12:03 - Incorrect plumbing
14:10 - Incorrect setup
16:32 - Component failure
18:36 - Damaged diaphragm
20:08 - Tuning safeguards
26:49 - Enabling closed loop control
37:12 - Applicable to any ECU
40:40 - Questions


