360 | How to Choose a 3D Scanner
Summary
You don't always have to spend big $$$ for the best 3D scanner for your application. Unfortunately, scanner performance metrics and advertising ploys can often send people down the wrong path. In this webinar, we'll discuss what these specs really mean and what you need to consider when looking for a 3D scanner for your projects.
| 00:00 | Hey team, Connor here from HPA and welcome to another one of our webinars. |
| 00:04 | This week we're going to be talking about how to choose a 3D scanner. |
| 00:08 | So, if you're looking at buying a 3D scanner in the future, this might be of interest to you, but also if you're just interested in the technology, then you might learn a thing or two about what's involved and the differences between all the different types of 3D scanners. |
| 00:24 | So, of course we're going to start by talking about the different scanner technology, just to make sure we're all on the same page when we're discussing some of the other factors. |
| 00:33 | Then we're going to get into the scanner metrics, so these are basically how we can measure and compare the performance of the different 3D scanners that are on the market. |
| 00:42 | There's a lot of really confusing metrics out there and marketing ploys by the sellers of the scanners to kind of lead you in the wrong direction, or not so much, but just advertise their products. |
| 00:57 | So, we need to understand basically what to take from that, what to believe and what to just kind of take with a grain of salt I guess. |
| 01:06 | And then we're also just going to talk about what we need to consider about buying a scanner for our own application, which assuming you're watching this webinar, will typically be for designing motorsport or automotive parts. |
| 01:19 | So, let's just start off with why you might want a 3D scanner. |
| 01:23 | If you're already using CAD then this is probably fairly obvious to you, but using a 3D scanner opens a lot of doorways and it's basically around the efficiency of our design flow. |
| 01:34 | So, we're able to take a 3D scan of an object or environment, something like an engine bay to an engine block or the side of a car or anything, small parts, large parts, and then basically use that as a reference in our CAD modelling software. |
| 01:52 | So, that could look like reverse engineering the parts, so for example if we're working on classic cars where we have old plastic parts that might be hard to replace, we might want to reverse engineer those and then maybe change them a bit and 3D print them for example. |
| 02:09 | Or we could use 3D scanning for what I refer to as scan based design, which is basically just using that as a reference to design new parts from. |
| 02:20 | So, for example if we have a scan of an engine bay and we have the scan of an engine that we want to swap in there, then we can kind of set that all up in our CAD software and then from there we can use that as a reference to design engine mounts to mount the engine in the correct location for example. |
| 02:39 | So, basically just saves us a lot of time with taking measurements and gives us a really good visual reference so in the end we should be able to design a lot faster and also a lot of a better product as well with being able to use that scan as reference. |
| 02:59 | So, let's start by talking about the different scanner technologies. |
| 03:03 | So, most of you will have one of these, if not this in particular iPhone, or some other smartphone, and most of these are now capable of 3D scanning to some degree. |
| 03:14 | Typically, that is done with a technology called photogrammetry and as the name might suggest that is basically the act of taking a lot of photos of an object from all different angles and then the software or the application in our phone is able to stitch all those photos together, recognising the features and basically create a 3D model from those features and understand the form and kind of structure or geometry of the object. |
| 03:46 | So, in most cases photogrammetry, especially at this level, is the least accurate kind of most rudimentary method, but that's not to say that's always the case because metrology which is basically the study of measurements, very accurate measurement taking, or yeah metrology grade photogrammetry can result in extremely high accuracy, so it's not always the case for photogrammetry just being the most basic kind of iPhone style 3D scanning. |
| 04:22 | If we progress up a little bit of a step from there then we start talking about LiDAR which some of you might know is also something now that iPhones have the capability of and basically this uses what's called time of flight technology, so it sends out a laser pulse and then as that, the waves, the light waves from that rebound off the object then it can time the time of flight between when that is emitted from the sensor to when it comes back and then from there it's able to basically build the structure in 3D space that LiDAR is kind of bouncing off. |
| 05:06 | This is often confused with laser 3D scanning and they're not really the same. |
| 05:11 | Laser 3D scanning when we're talking about 3D scanners specifically is more about based on the technology of triangulation and we have a lot of different 3D scanners here. |
| 05:26 | None of these are actually laser 3D scanners, but the idea of triangulation is the same with these scanners which we're going to get onto in just a moment. |
| 05:36 | Basically, we have a projector here that emits for laser scanners some laser light and then we have two cameras here, which will basically be able to see via this triangulation how that laser falls onto the surface of the object and then through the software or the programming of the scanner it can basically understand from how that laser interfaces with the surface, the shape of the surface. |
| 06:08 | So, that's what triangulation is, you have that central projector and then two cameras receiving that information or viewing how that laser light lands on the surface. |
| 06:19 | And that is very similar to structured light as well so that's what these scanners all are here and typically what's used in most automotive applications at the more entry level price point anyway because structured light scanning allows us to capture data very easily and quite quickly as well. |
| 06:44 | So, with structured light it's the same idea, rather than using a laser it's just using a structured light pattern from the central projector here so in this case all these LEDs around the outside are just projecting a light pattern onto the surface and that light pattern kind of looks a little bit like a QR code or something like that, depends on the scanner you're using, it's just a complex pattern and then the cameras can use the triangulation to view how that lands on the surface and kind of deforms and then from that it can build the 3D model. |
| 07:22 | And within the structured light realm of these 3D scanners, there's a lot of different variations within that and that's typically around what the light source is. |
| 07:32 | So, generally the most basic or most common one would be, or previously the most common one would be white light 3D scanning and then there's also blue light and infrared. |
| 07:47 | And if you studied physics or anything at school with light waves and things like that then you'd be able to maybe understand from that, and that's the difference between structured light and laser scanning as well, the intensity and also the wavelength of that light is kind of the key difference there. |
| 08:06 | And basically what that means is as the light lands on the surface, how it interacts with the surface is affected by the wavelength. |
| 08:14 | So, using those different sources of light can change how the scanner scans different objects. |
| 08:26 | And also infrared scanners, one of the main points there is that it is safe to the human eye so you can scan someone's face and things like that with infrared as well. |
| 08:39 | Another, so what we've talked about so far is basically going to be handheld portable scanners. |
| 08:48 | But there's also alternatives to this like CMMs or coordinate measuring machines. |
| 08:56 | And you might be familiar with something like a FaroArm. |
| 08:59 | So, we basically have a big arm with different axes and that'll have a little probe on the end of it and that can be placed on the surface of an object to measure its position in space. |
| 09:13 | And that doesn't rely on the scanner kind of tracking its movement, because each one of those joints on the arm has an encoder in it so it can continuously understand the position of the probe in space. |
| 09:26 | And typically in that case that has got really high accuracy, but super low resolution so you're just picking up points in space on the object. |
| 09:37 | We're going to get into those metrics a little bit more soon. |
| 09:40 | But that's not to say that these arms also aren't sometimes accompanied by something like a laser scanner as well to just give it a little bit more functionality. |
| 09:52 | And on the point of that, there's also hybrid laser and structured light scanners as well like the EinScan HX range there. |
| 10:03 | So, that's just combining kind of the strong points of a laser scanner, which is really good at capturing what we'd call troublesome surfaces, things like shiny surfaces where the issue there is that it reflects too much of the light that lands on the surface. |
| 10:23 | Or also dark surfaces where it absorbs too much of the light or translucent surfaces where the light just passes straight through it. |
| 10:35 | These scanners are very sensitive to how that light lands on the surface or interacts with the surface, because that's kind of the key thing that the cameras are looking for to understand its shape. |
| 10:46 | So, if we combine the benefits of a laser scanner, being able to deal with those surfaces and also a structured light scanner for just the efficiency of capturing data, then we can kind of get the best of both worlds in that case. |
| 11:01 | So, I'll just make a note here, if you have any questions as we progress on through this, just feel free to ask those in the chat and at the end then I'll do my best to be able to answer them. |
| 11:13 | So, we'll move on from here and next we'll discuss the scanner metrics. |
| 11:18 | And on my screen here I have a bit of a spreadsheet just kind of jotting down for my own personal use, how the metrics compare over all the different scanners that we have here for example. |
| 11:33 | So, I'll reference this as we kind of move on. |
| 11:35 | And the first metric, or the two most commonly discussed metrics when it comes to 3D scanners are the accuracy and the resolution. |
| 11:44 | A lot of people think that these are related to one another and in a lot of aspects they're actually not, they're two completely separate parts. |
| 11:53 | So, let's talk about accuracy first as that's probably the easiest one to understand when we're talking about measuring something. |
| 12:00 | How accurate that is is basically the deviation or the difference between our scan and then the real object. |
| 12:08 | So, often when we're looking at scanners, this will be quoted, in this case, I've just, we'll open this for example, just a link to this product. |
| 12:23 | And we see here it'll have this 0.03 millimetre accuracy. |
| 12:28 | Which sounds great for such a cheap scanner here. |
| 12:32 | And that might be the case and that might be great, but that doesn't really tell us the whole story, because the accuracy basically depends on the size of the scan that we're taking. |
| 12:44 | So, in some cases it'll just state the accuracy like that. |
| 12:49 | We kind of need to just take that with a bit of a grain of salt because the accuracy, again like I said, it depends on the size of the object we're scanning. |
| 12:58 | So, basically what that means is the larger the scan gets, the more we can expect the accuracy to decrease. |
| 13:04 | So, for the smallest scan we could take, then that might be the accuracy that they can quote. |
| 13:10 | And of course this is all, all these specs are kind of determined in a lab based environment anyway and when we scan in the real world, we might not actually be able to achieve something like that. |
| 13:21 | So, more typically we'll have something quoted like this where it'll say up to 0.3 millimetres. |
| 13:27 | Or for the Creality scan out here we have up to 0.02 millimetres at 60 millimetres. |
| 13:36 | More typically it might be given something like what we have for the Peel down the bottom here, so it's saying up to 0.25 millimetres per metre. |
| 13:46 | Or for the smallest scan you could expect to see 0.1 millimetres. |
| 13:51 | And in some cases the accuracy will be given as a percentage of the full size of the scan. |
| 14:00 | That's a little bit kind of easier to understand but basically what you need to know is that there's no kind of standard way for the suppliers or the manufacturers of the scanners to list these. |
| 14:12 | So, if you're comparing between two different scanners and you have a really cheap scanner like the 3DMaker Pro here stating an accuracy that's much better than a scanner that is worth a lot more money, then in a lot of cases you can assume that these aren't really fair direct comparisons. |
| 14:35 | For motorsport design, product design, we kind of want to aim for something in the ballpark of about 0.2 millimetres say, definitely under 0.5 millimetres. |
| 14:52 | Anything metrology grade is generally considered to be less than 0.1 millimetres. |
| 14:59 | So, that's the kind of ballpark that we're working in. |
| 15:02 | And it really depends on the application. |
| 15:04 | If you're scanning body panels of a vehicle for example, you might be able to get away with less accuracy, but if you're scanning something like an engine block or something with threads where we really wanna be accurate, then in that case we might need more accuracy. |
| 15:24 | And that's just something to keep in mind when we're designing our part as well, if we need to slot holes or something like that, because we don't really trust the accuracy, yeah then we might need to allow more room for those tolerances. |
| 15:37 | So, from there we'll move onto resolution and this is a little bit different. |
| 15:42 | So, this is basically often called the point distance and it's how much detail is captured by the scanner. |
| 15:50 | So, that's the distance between each of the data points that the scanner captures. |
| 15:55 | So, again just think of this like the amount of detail that we can capture. |
| 16:01 | So, if we look again at this kind of, the spreadsheet that I have here, we can see that the ball, this is roughly the minimum values here are within the kind of same ballpark as the accuracy values as well. |
| 16:18 | But this is actually a metric that's adjustable within the scanner and that's something that we need to consider, because more resolution isn't always going to be better. |
| 16:30 | Again, it just depends on what we're scanning. |
| 16:33 | If we're scanning something that's really big, we probably don't need very small resolution if we're scanning like a big body panel, like the door of a vehicle, then we don't need down to 0.1mm resolution and actually for a large scan, what's that's gonna just result in a massive file size that's gonna be hard to deal with anyway. |
| 16:58 | And the resolution can be kind of adjusted for different parts of the scans as well. |
| 17:04 | A lot of software now has the ability to increase the resolution in areas with a lot of detail and kind of make it more coarse and more simple over areas that are big flat surfaces for example. |
| 17:18 | So, again something like scanning a small mechanical part, we might want to increase that resolution under 0.5mm but for something like a large kind of body panel, maybe 1mm or even up to a few millimetres might be ok. |
| 17:38 | And that's usually adjustable in these dedicated scanners but in something like an iPhone, using photogrammetry for example, we can usually only expect lowest resolution of around a few millimetres or so and it's probably not gonna get too much better than that in most cases. |
| 17:58 | So, we touched on this briefly before when we were talking about the coordinate measuring machine, something like a FaroArm for example. |
| 18:06 | And that's the tracking of the scan. |
| 18:10 | So, as we have the scanner and then we're moving around the object, the scanner needs to continuously understand its position relative to the object or the object's position relative to the scanner. |
| 18:23 | And it does that via tracking and it tracks different features. |
| 18:27 | And generally scanners more the professional grade like the Peel unit we have here, that's gonna be able to pick up on geometric features of the object, also the targets which are like what we have just here, these small stick on targets that you see which will stick onto the object all over it or it depends how many we need, it's always different. |
| 18:55 | So, it'll be able to track using those targets as well and in some cases it'll also be able to track using texture. |
| 19:04 | So, texture in this case is really just the colours of the object, so it'll be able to pick up on texture features, things like logos or just even markings all over the object to be able to track as well. |
| 19:19 | And some of the cheaper options aren't able to do this and might just be able to track off geometry or targets for example and not be able to pick up texture. |
| 19:31 | And that doesn't mean that we always want to use all three of them, the tracking methods as well. |
| 19:38 | In some cases it can just be best to use one. |
| 19:41 | So, it really depends on what we're scanning, the scanner we're using and the software we're using too. |
| 19:50 | And saying that something can track better if it's able to track a different amount, if it has all these different tracking methods isn't necessarily true as well. |
| 20:01 | And this is something that's probably the hardest thing to kind of quantify when we're talking or comparing 3D scanners, because the quality of the scanner and the electronics in it, the processes and things like that and the software and the computer we're running all has a big influence on that. |
| 20:18 | So, even though something might have the specs to say it's great, the actual reality of using it, it might be really difficult tracking and that I've found has been the most frustrating thing in using 3D scanners is when you're trying to scan something and it keeps losing its tracking, that's where errors creep in and it just takes a long time to scan something. |
| 20:41 | But that is a difficult one to pick up off the specs of the scanner. |
| 20:46 | Next and somewhat related to this is the scan volume, the field of view or the depth of field. |
| 20:55 | So, I just had an image up here and this will help us to kind of understand this. |
| 21:03 | So, due to the use of the triangulation technology, that basically results in having a certain field of view in front of the scanner that data can be captured from. |
| 21:17 | So, in this case this image is just comparing two different models of scanners and the different kind of scan volumes or the ranges that they can scan from within. |
| 21:29 | So, if we imagine this zero point here is right in the middle of the projector and then as the triangulation kind of comes out from these cameras, that's going to create a range out here that as we're pointing the scanner, it can capture data from. |
| 21:47 | So, what we need to understand here is that there will be a minimum distance from the scanner that the data will be able to be captured from and a maximum distance as well. |
| 22:03 | So, basically the field of view is each one of these squares or if we're looking at this larger one, it'll be this kind of rectangle shape here and this one here. |
| 22:15 | And that's clearly different at the start of the range, it's gonna be smaller compared to the furthest distance, it's gonna be bigger. |
| 22:23 | So, what you'll find is often when manufacturers are stating the specs of the field of view of the scanner, they will do that at this furthest distance, because it'll give a larger number that basically just looks a little bit better. |
| 22:39 | So, if we look at the capture area here, then we see for example the Revopoint Range here is saying at the near distance, this is what it can capture and at the far distance, this is the size here. |
| 22:54 | But in some cases the value will just be given at the furthest distance. |
| 23:00 | And then the working distance here is essentially the depth of that field of view as well. |
| 23:06 | So, basically, and this is a generalisation, what you're gonna want is to have a larger, for most cases you're gonna want a larger capture area, because that means you can collect data from a larger area and also a larger working distance, which gives you a little bit more flexibility in the range as you move around and scan the object, it makes it a little bit easier to scan the object. |
| 23:31 | Now, that's not always the case because if we're scanning something small on the bench in front of us, say on a turntable, we might not want to capture such a massive area if it's just a small target because we're just gonna take in a lot of the background that we need to remove afterwards anyway, and that's just gonna slow down the processing and things like that as well. |
| 23:52 | So, a lot of these really depend on the application or what you're gonna be scanning. |
| 23:59 | Of course if we're gonna be scanning something like the exterior of a vehicle, then having a large working distance and a large field of view or capture area is gonna be a beneficial thing and then this kinda comes back to go hand in hand with the resolution as well. |
| 24:16 | If you're capturing a large area then you're gonna want to be able to use a higher resolution so a lot of scanners, we'll just jump into the Peel software here and click new scan, have these kinda settings that we can set up depending on whatever we're scanning. |
| 24:35 | So, for example if we're scanning something really small, then we might scan with a lower resolution for example and you can see here it's just dropped down that scanning area as well so in this case it's only gonna use 60% of that kinda field of view. |
| 24:56 | If we're scanning something large you can see it's bumped the resolution up and the scanning area up as well and of course we can go in and kinda override these values depending on what we wanna use but you can see how they're kind of related and it's recommending us some settings based on the size of our object and the amount of detail of the object as well. |
| 25:18 | So, that kind of guides us to what is suitable I guess. |
| 25:24 | Another factor to consider is the frame rate. |
| 25:28 | So, this is basically as the scanner is moving around and it's taking that data in, it's just like a camera how many frames per second for example that it's taking. |
| 25:42 | The faster is generally gonna be better, so we can capture data faster but a lot of this really comes down to more the processing capability of our computer compared to other factors like the actual maximum possible frame rate of the scanner. |
| 26:03 | Typically, the computer is the limiting factor here that can't keep up and that's something that we need to consider with the scanner is the capability of our computer to keep up with it or to run that scanner. |
| 26:17 | So, we can see here that there's recommended requirements that have kind of taken down for each one of these scanners and typically as the scanners get more powerful and can capture more resolution and things like that, the memory requirements and the graphic card requirements tend to go up with them as well. |
| 26:38 | So, that's just something to keep in mind that if you're looking to purchase a new scanner, for example we have the Shining 3D Einstar here and that's a great scanner for $1000 USD but compared to some of the other cheaper scanners, this does require more processing power from the computer as well. |
| 27:01 | So, if you don't already have a computer capable of running it, then maybe that's something that you need to keep in mind. |
| 27:08 | It's not just the cost of this, you might need to upgrade your computer as well. |
| 27:13 | And we have, this is quite a grunty computer here that we use for our 3D scanning, but even in the case of using this Peel 3 scanner, in some cases depending if we're working on a really large scanner, we're trying to capture colour texture for example, it can struggle to keep up. |
| 27:32 | So, they are quite demanding on the computer. |
| 27:36 | Just something to keep in mind I guess. |
| 27:40 | And there's, as you can see here on the screen, there's a lot of other metrics used and this is only kind of the main ones that I like to look at. |
| 27:49 | There's an endless list of other metrics on the scanner's spec sheets that they use to kind of market the scanners I guess or compare them to other scanners. |
| 28:03 | And some of those might be relevant to you and some might not be. |
| 28:07 | So, it really just depends on what you're working on. |
| 28:10 | Again, if you have any questions, jot them in the chat and I'll do my best to answer them at the end. |
| 28:15 | Let's first just talk about some other things that we might want to consider when we're looking to purchase a scanner or just comparing scanners that you might want to use for a project. |
| 28:27 | So, one of them is going to be what you actually require for your work. |
| 28:31 | And typically a lot of us at the hobbyist level are going to be doing quite a big range of different projects. |
| 28:38 | We might be designing something or reverse engineering something really small one day and then maybe another day we are scanning a large area. |
| 28:48 | So, it's good to kind of have that flexibility. |
| 28:50 | So,me people though are typically just using their scanner for one specific thing, maybe they're only scanning really small objects. |
| 28:58 | So, maybe in that case having a small capture area, but a high resolution and accuracy is going to be important to them. |
| 29:08 | There's a good example of this would be, this is our Peel 2-S scanner. |
| 29:12 | That's the first dedicated scanner we had here at HPA. |
| 29:16 | And that kind of goes along and it has another product that it's offered next to, although they're outdated now by the Peel 3, and that is the Peel 2. |
| 29:27 | So, sorry, this is the Peel 2-S that we've got and the Peel 2 is also offered as well. |
| 29:32 | And they're very similar price, although this is kind of the discounted price now, because the Peel 3 has outdated them. |
| 29:40 | Similar technology used, both just work on Windows computers. |
| 29:46 | The accuracy is very similar but the resolution that the Peel 2-S can capture is much greater than that of the PL2. |
| 29:56 | But also the capture area and the working distance is a lot smaller. |
| 30:01 | So, it's actually a lot harder to use this scanner to kind of capture large areas. |
| 30:06 | Working with this, even though this is a relatively expensive scanner, scanning something like an engine bay is really difficult whereas if we used a more basic product like the Revopoint Range 2, that's a lot cheaper, that has much larger working distance, it can scan something like that with a lot more efficiency. |
| 30:29 | But yeah, if you really need that resolution, then this is a great scanner to use for that as well. |
| 30:36 | So, keep in mind that it just depends what you're going to be working on. |
| 30:39 | If you're going to be scanning small parts, high resolution, with a lot of detail, then good resolution is going to be important to you, if you're just scanning the exterior vehicles, maybe you're always designing body kits or aero packages, then having a bigger working distance or field of view is going to be more beneficial to you. |
| 31:01 | Another factor here is you'll see all of these scanners in this case capture colour texture, so that's great. |
| 31:08 | I typically, it's cool to be able to capture the colour, how much of a use it is to us in motorsport design is typically not very useful, but for scanning other, for other purposes like they scan vehicles to bring them into video games and things like that, then colour texture is great, it's usually nice to have. |
| 31:33 | I found with the Peel 3 anyway that it slows down the process quite a lot, so I typically don't capture the colour if I'm just trying to work efficiently on something. |
| 31:45 | Probably one of the main driving points behind this is going to be the budget that you have for this. |
| 31:52 | So, you can see these are really all just kind of entry level scanners, you can see these are really just the hobbyist options here, we've got the Shining 3D Ironstar, Creality Scan, Otter, 3D Maker Pro, Moose and the Revopoint Range, and they all come in at under $100 US dollars. |
| 32:14 | And then from there it's typically a pretty big jump up from the EinStar to, yeah, in the few thousand dollar and then north of that up to $10,000 or so and then they go up from there very quickly, $50,000 US dollars, $100,000, all kind of with diminishing returns I guess as you get up to the top level. |
| 32:41 | But there is, with all these 3D scanners I will say that typically you get what you pay for, so maybe just keep that in mind. |
| 32:50 | But this is a very fast changing technology and a lot of these cheaper scanners are catching up to the more expensive stuff very quickly. |
| 33:00 | I was able to talk to someone who actually has a business selling the very expensive scanners and they also rent them as well, and he said in his situation for someone who owns a lot of these scanners it's quite scary how good the cheaper scanners are getting because it's really devaluing the expensive products or making them hard to justify. |
| 33:20 | So, just keep that in mind. |
| 33:22 | Another thing to consider is the software, because all of these scanners kind of have a software that goes along with them. |
| 33:31 | And in a lot of cases you can only use that software with that specific brand of scanner. |
| 33:38 | So,me software packages like I think Creaform's VX model I think you can bring in scans from other scanners into them as a kind of post-processing thing. |
| 33:51 | But when you're scanning something you're going to be using that software and there's a lot of difference between these different softwares of what they're capable of and what features they have. |
| 34:02 | For example, some of the more basic software you can't take multiple scans of one object and then merge them together. |
| 34:10 | And that makes it really difficult if you've got to scan one side of something and then flip it over and then scan the other side. |
| 34:16 | It's usually best to just do that in two scans and then merge them together. |
| 34:21 | And if that's not possible in that scanning software that can be quite annoying, because you'd have to then go and use a different third party software to get that job done. |
| 34:33 | There's also for example if we just jump back into the Peel software, this is the basic Peel OS which is just the operating system for the scanner. |
| 34:43 | I don't have the scanner plugged in but you can just work through all these steps to do the basics of scanning and then cleaning the scan, merging the scan, aligning it with the coordinate system and then some more editing and if you've captured colour texture there and then exporting that mesh file. |
| 35:03 | And then from there it's actually possible to take that over into Peel CAD which is kind of an extension to that and that's the software's worth a couple of thousand dollars on top of the actual scanner price. |
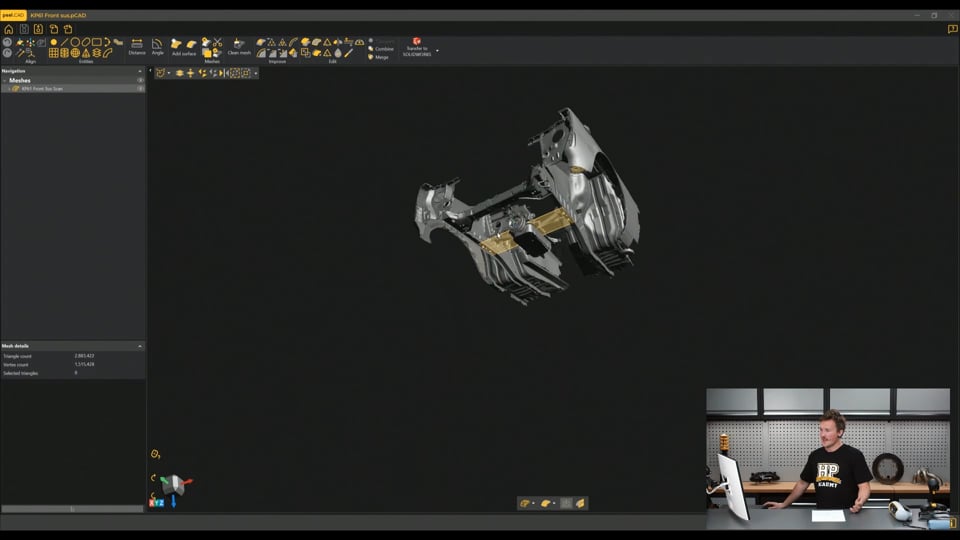
| 35:19 | And this is the front end of Brandon's Starlet rally car project that he's building. |
| 35:26 | So, I've just taken this scan over the weekend to design some suspension parts for it. |
| 35:32 | And then you can see in this software as well there's a lot of other features here, the ability to extract entities from it so basically find those planar surfaces that we're interested in using. |
| 35:45 | You could scan an exhaust pipe for example and fit the pipe centrelines to that, all these great reverse engineering tools there and then be able to transfer that straight over to Solidworks or Fusion or whatever else there. |
| 35:59 | So, there's a lot that you can do inside software like that, but that's kind of the next step up above the typical scanning software stuff and then there's other software packages like Geomagic Design X which are just levels above this as well. |
| 36:15 | So, just something to keep in mind, consider the software as well when you're purchasing, looking at a scanner to purchase. |
| 36:24 | We've already covered the computer requirements, but something that you might want to keep in mind, an example of this is the Revopoint Range for example, I can just connect this to my iPhone and I can scan that completely, just hand held, walk around something outside and scan that to an app on my phone and then I can just airdrop the scan basically from there straight to my computer and start working on it. |
| 36:53 | But an example would be something kind of different set up would be the Shining 3D here and in this case this is quite large computer requirements and it also has kind of a lot more cords coming off it as well so if you're fine to be tethered to your computer and scan at the same time then that's going to be fine and this might do a better job in that case but if it's quite important to you to have that flexibility then you might want to consider something like the Revopoint. |
| 37:31 | That kind of brings it to the end of the main points that I wanted to discuss anyway, hopefully that's given you a bit of insight into how to compare all these different scanners. |
| 37:43 | Before we move on, just one other point I wanted to talk about with this Creality Scan Otter here, you might not be able to see we don't have the overhead on but this actually has an extra set of cameras there, this is just another feature that some scanners have and that just allows us to adjust when we're adjusting the size of the object that we want to scan that can drastically change the field of view of the scanner. |
| 38:12 | So, there's other features like that that we can consider as well. |
| 38:17 | But again hopefully that's given you a little bit of insight if you're looking into purchasing a scanner what you might need to consider or if you're not and you're just maybe interested in the technology hopefully you've learnt something new there about scanners. |
| 38:31 | We're currently in the process of putting together a 3D scanning course at the moment which will be hopefully released before the end of the year. |
| 38:40 | So, if you are interested in this topic we dive into a lot of different details around 3D scanning in that course and all the practicalities of actually using 3D scans for motorsport design and reverse engineering, scan based design and so on and we'll be working with worked examples in that as well and really show you how to use this technology to your advantage, because it's just becoming more and more useful and more and more accessible as well. |
| 39:11 | So, with that I'll just jump in and see if we've got any questions. |
| 39:15 | So, Osger says "Which 3D scanner technology can't recognise reflective surfaces?". |
| 39:22 | And then "All 3D scanners.". |
| 39:24 | So, no, so structured light scanners, depending, specifically the white structured light scanners have a lot more trouble with reflective surfaces compared to something, if you kind of change that a little bit to the blue structured light scanners, that's a bit of an improvement, because of the wavelength of the blue light and then from there the laser scanners actually work with reflective surfaces a lot better basically just because of the intensity and the wavelength of that laser light beam. |
| 40:01 | So, that helps a lot there. |
| 40:03 | So, yeah, structured light scanners are more temperamental to troublesome surfaces. |
| 40:09 | Laser scanners are a lot better at dealing with them but they're kind of fall back of a laser scanner as typically the rate at which you can capture data is a lot less efficient. |
| 40:20 | So, that's kind of the positive and negative I guess of those two cases. |
| 40:24 | That looks like that's all the questions we've got. |
| 40:27 | So, again, like I said we've got a 3D scanning course in the works at the moment but yeah, thanks for watching and we'll be back next week I think with another topic. |
| 40:37 | So, we'll see you then. Cheers. |


