350 | Engine Protection Strategies - MaxxECU
Summary
It can be difficult or impossible to monitor all your engine parameters while driving your car but fortunately you don’t need to. In this webinar we’ll be using the MaxECU and demonstrating some of the engine protection strategies available.
| 00:00 | Hey team, Andre from High Performance Academy, welcome back to another one of our webinars. |
| 00:05 | And this time we're going to be diving into engine protection strategies, specifically in the max ECU range of ECUs. |
| 00:12 | So, what are we talking about when we use that term engine protection? Well it's essentially a range of different functions that we can use to do exactly what it says on the label, protect our engine from conditions we weren't expecting. |
| 00:25 | These could be as simple as starting with the most basic, which we'd like to think every tuner is using which would be a rev limiter and perhaps a boost cut or map limit for turbocharged or supercharged vehicles. |
| 00:39 | We can get a lot more granular with this as well, we can look at protecting the engine if the air fuel ratio moves lean, we can also protect against high exhaust gas temperature, and probably one of the other more common ones that I try and incorporate wherever possible is a protection for low oil pressure. |
| 00:58 | The problem with not using the ECU and relying on monitoring a range of gauges is that particularly for a race application car, it's just not possible for the driver to monitor all of the gauges that they'd need to as accurately and quickly as they would need to in order to be able to pick up maybe a momentary spike or drop away from oil pressure mid corner or something like that. |
| 01:24 | This also really takes away from the fact that the driver should be focusing all of their energy on driving the car so I've always been a huge advocate for incorporating as many ECU based protection strategies as I can. |
| 01:38 | I also like wherever possible to have a driver warning light. |
| 01:43 | I'm going to typically do this through a dashboard, and this can bring the driver's attention to the fact that something's wrong. |
| 01:51 | This strays a little bit from the key focus of today's lesson, but I'll just mention that quickly anyway because it's super easy to incorporate if you've got an aftermarket dash, almost irrespective of what it is. |
| 02:04 | But for example, again the driver doesn't want to be looking at the oil pressure, just as one example, while they're driving the car. |
| 02:14 | Lambda would be another one. |
| 02:16 | What I'd be doing is monitoring where they are on the track, maybe watching the shift light, that's about all I ever look at, and being able to basically precisely position the car on the track, choose your braking points, your turn in points, make sure that you hit the apex and basically all of the things that you need to do in order to optimise your lap times. |
| 02:35 | At the same time, if something does go wrong, the driver obviously needs to know about it so incorporating just a driver warning light on the dash or somewhere that will bring the driver's attention immediately to the fact that something isn't wrong, they can then look at the dash to find out a little bit more about what that specific issue is and then from there they can also decide what the correct course of action is. |
| 02:58 | Maybe if it's something minor, you could limp the car back to the pits or even just keep racing at full speed but have in the back of your mind something might be failing so keep an eye on that. |
| 03:08 | Alternatively if it's a major and you've got a hole in something that's just lost all control, clearly we want to shut that engine down absolutely immediately and get the car off the track. |
| 03:18 | Alright, so that's the gist of it, basically using the ECU to do things quickly and efficiently in the background so the driver can concentrate on what the driver should be doing which is driving the car. |
| 03:28 | But there are a range of things as always to keep in mind with all of these parameters. |
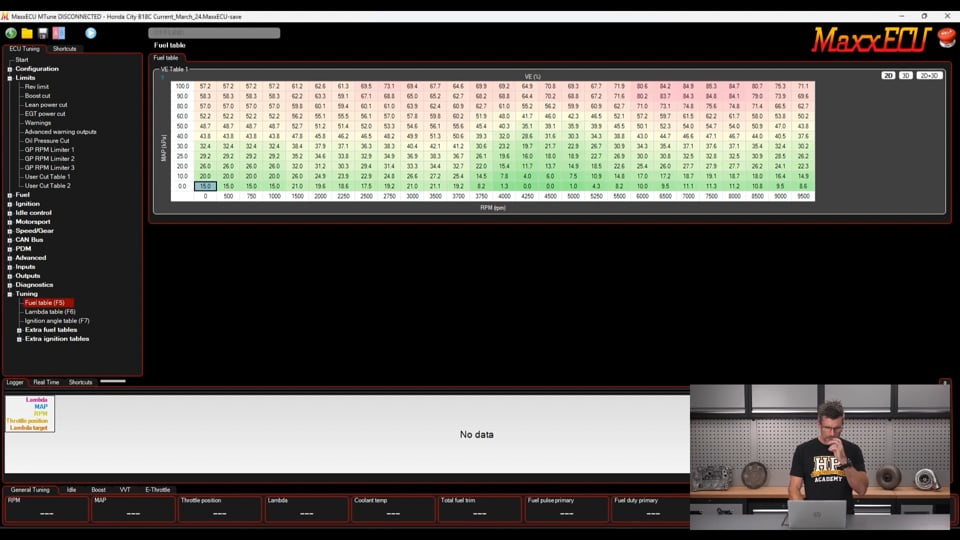
| 03:32 | Enough talking, let's jump into our laptop software here which is our MaxxECU M-Tune software. |
| 03:40 | Now essentially this area here which I've expanded out already which is our limits, which is where we're going to be working for our engine protection. |
| 03:49 | Oh, probably worth mentioning here that there are a range of different ways of skinning the proverbial cat here so this isn't necessarily what I talk through here, it isn't necessarily going to be the absolute only way of achieving these aims, but we'll talk through the different options as we go. |
| 04:09 | I should also mention this is probably going to be a slightly shorter webinar than normal. |
| 04:14 | As always we'll have questions and answers at the end, so if you do have anything that pops up, I would urge you to get your questions in to Jordy quickly so I don't miss them at the end. |
| 04:25 | Alright so let's start at the top here with the two parameters that I mentioned pretty much every ECU should have. |
| 04:32 | I'll start with our rev limit. |
| 04:34 | So, we've got first of all a couple of ways of setting this up. |
| 04:38 | We've got our rev limit source here, single value and we've set that to 8800 RPM. |
| 04:43 | If we look at this though, we can have two different RPM limit values or we can have a complete table, really up to the individual as to how we're going to do that. |
| 04:53 | This is a little bit outside of the scope of what I really wanted to focus on. |
| 04:58 | Most people can understand how a rev limiter works. |
| 05:01 | What I wanted to talk about though was the type of limiting that is used because this is really really important, particularly for some slightly more fragile engines where the valve train can be damaged if the wrong type of limiting is used. |
| 05:15 | So if we come down here, we've got our rev limiter settings and we can see that this has been set up to a fuel cut limiter. |
| 05:22 | If we look at our drop down menu, we've got the option of a 100% fuel cut, 100% ignition cut or then we can have a fuel plus ignition, 100 RPM later or the inverse, ignition plus fuel, 100 RPM later. |
| 05:35 | So, the recommendation here from MaxxECU is actually to use a fuel plus ignition 100 RPM later for the smoothest limiting overall. |
| 05:46 | A lot of people get scared of the idea of using a fuel cut type limiter. |
| 05:52 | Thinking that if we're cutting fuel, this sounds like the problem is we're going to end up potentially with a lean air fuel ratio and I understand that concern. |
| 06:02 | And there are some real concerns around that, which I'll talk about but what we need to know is when we're cutting fuel, we're cutting all of the fuel being delivered into a single cylinder instantly. |
| 06:13 | So, essentially it's only got air going through it and hence we have no combustion at all so we're not going to have a lean event, all of the fuel to a particular cylinder is being cut and that's randomised between the different cylinders in order to achieve our fuel cut, our rev limiter. |
| 06:28 | If we use an ignition cut, obviously it's doing it the opposite way, we've got the ignition, the spark event being cut, we've still got fuel going through the cylinder so we've got an unburned charge of fuel and air that's gone through the cylinder, it hasn't been ignited and that's going out into the exhaust. |
| 06:45 | And this is where we can have problems with some engines. |
| 06:49 | There's a range of engines that do have sensitive valve trains. |
| 06:53 | SR20DE and DET are classic examples that you need to be absolutely very careful of. |
| 07:00 | They've got a very heavy rocker arm, it isn't well supported, there's a lot of inertia with that, and what happens when we use an ignition cut is that unburned fuel and air then makes its way out into the exhaust and if we've got a turbocharged engine with a hot exhaust, it can end up igniting in that exhaust manifold and then what it does is it creates a pressure spike which can bounce the closed exhaust valve back off its seat, opening it up. |
| 07:26 | At that point the rocker which should be contacting the tip of the valve, the pivot and the camshaft all at the same time, that will lose contact or potentially lose contact and control and then it can bounce off and basically everything after that is pretty bad. |
| 07:43 | So, we want to stay away from that. |
| 07:45 | So, that is why I would always recommend fuel cut or in this case we could use the fuel plus ignition cut 100 RPM later. |
| 07:55 | I would just typically try both of those and see how it works on your particular engine, what it feels like and which is smoothest, you can judge that for yourself. |
| 08:04 | We've also got our cut pattern here which as you can see is random or sequential. |
| 08:10 | Again you can try both of these, I generally like to use a random limiter where possible. |
| 08:17 | It just means that we're not going to be limiting on the same cylinder repeatedly and that can help reduce the harshness in the engine or inherent vibrations that can be caused by this occurring. |
| 08:29 | Other thing that's often overlooked here is our RPM or rev limit control range which is 200 RPM. |
| 08:39 | So, what's going to happen here is that we've got our rev limit set to 8800 RPM. |
| 08:45 | However that's when the beginning of our soft cut is going to happen. |
| 08:49 | So, basically between 8800 RPM and in this case plus 200, so 9000 RPM, we're going to be ramping from a 0% cut up to 100% cut. |
| 08:58 | So, you do need to be mindful of this in terms of what the maximum RPM range that your engine can safely handle is going to be because if you absolutely do not want your engine to exceed 8800 RPM, if it's set up like this, you definitely will. |
| 09:14 | So, you need to account for that with what you actually set your rev limit RPM to be. |
| 09:20 | In this case again if you didn't want to go past 8800 and you wanted a 200 RPM control range, well clearly we'd just set that to 8600 and that should achieve our desired aim. |
| 09:31 | But I know that different ECUs do this in different ways so it is important to understand how that works. |
| 09:37 | Now you might be asking well why have a control range at all? And absolutely you could set this control range here to zero, which would mean that the second we hit our RPM limit or our value here, in this case still 8600, we're just going to go straight to a 100% fuel cut. |
| 09:55 | It'll work, but it is absolutely horrible and it's very very harsh. |
| 10:00 | It can also be pretty harsh on the vehicle drivetrain as well, not to mention the engine so I do generally prefer something a little bit smoother than that. |
| 10:07 | The only exception to this would be, I've tuned in some control classes where there is a control rev limit and we're not allowed to exceed that rev limit. |
| 10:17 | And in that case you want to use all of that rev range that's available, in that case a very very small control range or zero with just a hard cut at the limit would be the way to go. |
| 10:29 | A couple of other options here that again probably a little bit outside the scope of today's lesson but you can also use ignition retard at the limiter to smooth the RPM limiting out and some fuel enrichment which I generally don't see the need for. |
| 10:45 | Interestingly the MaxxECU also has the option for this predictive limiter. |
| 10:50 | So, a problem we can see in some engines that have very low inertia, so very very light flywheels and clutch assemblies is that they can accelerate so quickly that they can sort of almost pull past the rev limiter. |
| 11:03 | So, this predictive limiter can be used to essentially look at the rate of change of RPM and then change the rev limiter so essentially if the engine is deemed to be accelerating very very quickly, they can pull the rev limiter down a little bit just to make sure that we're not going to actually exceed the limit. |
| 11:21 | So, here we go, very very simple, something that absolutely every engine should have, a rev limiter. |
| 11:27 | Particularly this is one of the first things I set up when I'm tuning a fresh ECU as well. |
| 11:31 | Before I've ever started the engine for the first time, what I want to do is make sure that it has an appropriate limiter and actually while I'm just getting the engine up and running, just to avoid any potential problems, let's say a sticky throttle or maybe it's got a massive air leak, I'll actually normally set that rev limiter down at something like 2500 to 3500 RPM. |
| 11:52 | If I start the engine and it just flares up, it's not going to sit a freshly built engine up at a 8800 RPM limit. |
| 11:59 | The only caveat I'd say with that is really really important and it's caught me out before, when you actually are comfortable that everything's set up properly, come back and re evaluate your rev limiter and maybe raise it up to something a bit more appropriate to actually begin tuning. |
| 12:15 | You'll find out very quickly that you've got the rev limiter still set at 2500 RPM, but it can be a little bit frustrating. |
| 12:22 | Alright so that's our rev limiter, let's come down to our boost cut. |
| 12:26 | And again this is something that really every turbocharged engine should have. |
| 12:31 | Little bit less of a concern on a supercharged engine just given that the boost level is generally going to be set by the pulley sizes for the supercharger et cetera. |
| 12:43 | So, if you've got your supercharger set up to deliver 15 psi of boost, it's going to be difficult if not impossible for it to suddenly spike up to 30 psi which absolutely could happen with a turbo. |
| 12:57 | So, we've obviously got this enabled, this is actually a map from a naturally aspirated engine so not relevant but worth showing you. |
| 13:06 | We've got the boost limit value here, so again we can have a fixed value or a table depending on how you want to set this up. |
| 13:14 | We've kept this nice and simple with a 270 kPa limit. |
| 13:17 | And an activation delay. |
| 13:20 | Now this needs to be treated very very carefully here. |
| 13:23 | It's quite common that you're going to see a little bit of variation on your boost from your target and this really comes down to the control strategy used and particularly around the closed loop PID control tuning. |
| 13:37 | But not uncommon to see some small amount of overshoot, particularly as the engine comes up on boost. |
| 13:43 | So, depending how tight you want your limit to the actual boost pressure you're running, you may end up exceeding it so I'll talk a little bit more about appropriate control range in a moment. |
| 13:56 | So, that's where this activation delay can be used. |
| 13:58 | So, in this case .4 of a second, probably a little bit more than I'd be comfortable with. |
| 14:03 | Generally if you've got an overboost or a slight overshoot, I'd really be unhappy if that lasted for more than about 100 milliseconds. |
| 14:12 | .4, particularly if for example the boost line came off your wastegate so you've literally got no boost control, .4 of a second is a long time and you're going to end up well past a safe boost level before this actually comes into play. |
| 14:29 | So, I'd be inclined to drop this down to more something like around about 0.1 at the absolute most. |
| 14:36 | Now talking about that limit level as well, and again a little outside the scope of the specifics of what we're talking about today, but I would generally set my boost cut probably around about 20 kPa higher than the maximum boost that I actually expect to run. |
| 14:52 | So, straight away I'm already building in a little bit of a buffer set for some slight overshoots in which case we could bring this activation delay down to zero. |
| 14:59 | So, I know that the flip side of that is some tuners like to run that limit tighter to the boost pressure that they're running in which case you could be more prone to having that overshoot actually hit your boost limit. |
| 15:13 | Right and then also we've got reactivation. |
| 15:16 | So, basically what is going to get rid of this boost cut? So, in this case the driver's going to have to back off the throttle below the value here which is 10%. |
| 15:28 | So, if we click on our drop down menu, below our fixed TPS or 8% throttle change. |
| 15:34 | So, an interesting way of dealing with this, every ECU's a little bit different, but basically this is going to require the driver to actually do something to reintroduce power. |
| 15:44 | If you just stay at full throttle it's not going to be that great. |
| 15:48 | Ok, so those are our two primary ones which I think most people wouldn't even consider as engine protection, but definitely it's the most important and the easiest because every ECU is going to include these. |
| 16:02 | We'll come down to our next one now which is our lean power cut. |
| 16:06 | So, essentially this allows it to do exactly what it says, to cut power if the air fuel ratio is lean. |
| 16:16 | So, the MaxxECU, this particular one has an onboard lambda sensor so it's always monitoring air fuel ratio. |
| 16:22 | Let's have a look at the options here. |
| 16:25 | So, we've got our activation conditions here so minimum manifold pressure, minimum RPM and minimum TPS. |
| 16:31 | So, I've just got some default values in here. |
| 16:34 | We'll have to be over 180 kPa manifold pressure, above 3000 RPM and above 80%. |
| 16:41 | So, basically what we're trying to do is make sure that this is going to only come into play when we are genuinely under heavy load. |
| 16:49 | Because if we look at what our lambda plot is going to do on a full lap around a racetrack or even a drive on the road, you will find that under transient conditions sometimes, even with the transient enrichment set up correctly, you're quite likely to have a lean spike here and there and we obviously don't want this coming into play unless we absolutely need it. |
| 17:13 | Despite a lot of people thinking that if we run the engine lean at part throttle cruise we're going to damage it, the reality is nothing could be further from the truth. |
| 17:21 | When we're in low manifold pressure, light throttle conditions, the only danger that we're going to have with a lean air fuel ratio is that it's going to become so lean that we won't be able to light it off correctly or reliably and that'll cause a lean misfire. |
| 17:36 | So, we're definitely not going to damage the engine under cruise conditions or idle conditions; so it's really the high load area that we're interested in. |
| 17:44 | So, then we've got the lambda threshold. |
| 17:48 | So, again we've got a few options here, we've got our lambda threshold source as a fixed value or we can actually have a lambda table and then this case with our fixed value, our maximum lambda is 0.9. |
| 18:03 | So, basically if our lambda is higher than 0.9, that's going to trigger our lean protection. |
| 18:11 | So, then we've got a soft cut or misfire that can be introduced. |
| 18:14 | So, that is enabled at the moment, again we've got a time before soft cut. |
| 18:18 | This one needs to be thought out a little bit. |
| 18:21 | Again 0.4 of a second, it is quite a reasonable amount of time. |
| 18:24 | We need to factor this in to make sure that it's not so short that a short sharp transient lean spike triggers this, we don't want that happening because it'll be needlessly cutting power. |
| 18:36 | But 0.4 of a second, if we were at say 3 bar of boost and 8000 RPM, 0.4 of a second running very very lean, that's quite a long time. |
| 18:46 | So, probably a little bit longer than I'd want it but again we do need to leave a bit of a threshold. |
| 18:51 | A little story about this, when I was racing my Evo drag car many years ago, we actually took it over to Willow Bank in Australia for the 4N Rotary Jamboree which is a really big event there. |
| 19:05 | I hadn't raced the car outside of New Zealand and at least for our first shakedown I was understandably a little bit nervous about whether the atmospheric conditions there were going to have much impact on the fuelling. |
| 19:17 | So, I was a little bit over cautious and I did set up a driver warning for lean lambda and what that was actually doing was triggering, I hadn't thought this through which is why I mention it, hadn't thought this through and of course using a ignition cut on gear shifts, so that we could upshift clutchless, what that of course does is create a sizable lean spike and that was triggering my system. |
| 19:43 | Again that would prevent that with a delay. |
| 19:47 | Then we've got our total power cut. |
| 19:50 | So, if we're still lean at .8 of a second, we're going to reduce power completely and then we've got reactivation very much similar to what we looked at. |
| 20:00 | So, again a really good system as long as it's thought out properly in terms of how you implement it, the numbers that you're using here and make sure that it's only coming into play when you genuinely want it to be. |
| 20:14 | Next we move down to our EGT power cut. |
| 20:18 | So, exhaust gas temperature, great way of just monitoring what is going on with our combustion temperature in a roundabout way. |
| 20:26 | Particularly as well, we're going to find that if our exhaust gas temperature reaches a certain threshold, we're likely to damage downstream components such as our turbine wheel and our turbocharger. |
| 20:37 | It's always a moving target because materials are improving all the time, but generally much over a sustained 1000°C, maybe 1050°C, we're going to end up damaging the components of the turbine wheel. |
| 20:51 | So, we don't want to do that. |
| 20:52 | I'd sort of argue though that once we're up at that temperature, that's probably pretty dangerous for the engine under most conditions as well. |
| 20:59 | So, let's have a look at our options here. |
| 21:02 | Again we've got our activation conditions pretty similar to the activation conditions we've already looked at, won't dwell on those. |
| 21:10 | Again I'd say a one second activation delay, probably a little bit conservative there. |
| 21:16 | I've looked at some logs from engines that have been lost down the drag strip and when things start to go bad you sort of see that EGT ramp up very very quickly and you do want to be on it pretty quickly to try and prevent that damage. |
| 21:32 | We've got our cut temperature, again you can use a table or a fixed value, we'll have that set to 1000°C and again we've got reactivation. |
| 21:40 | All pretty straightforward. |
| 21:42 | We'll just come forward, I'll just bypass our warnings and come back to that. |
| 21:47 | Oil pressure cut, so this is probably one of the ones that I think everyone should be incorporating. |
| 21:56 | This is such a common way of losing an engine, particularly for road driven cars that are taken out onto a racetrack. |
| 22:04 | The reality is that the majority of factory sumps are just not designed to cope with the lateral G forces that we can generate on a racetrack. |
| 22:15 | Once we start modifying the car with sticky tyres, slicks for example, better suspension, all of that good stuff which allows us to generate maybe 1.5 to 2G lateral through a corner, that always has the oil in the wet sump sloshing away from the pickup and all it takes is that pickup to just suck in a little bit of air and that can almost instantly result in bearing damage and if you don't know about that, then it's very quickly going to result in some fairly catastrophic damage, including a conrod actually breaking in half when the big end journal kind of welds itself to the crankshaft because we've got no longer any lubrication or bearing material in there; so we don't want that happening but the number of engines that I have rebuilt as a result of this sort of problem on a racetrack, this is absolutely something that we do want to be on top of. |
| 23:13 | So, let's have a look here, we've got our oil pressure cut obviously is enabled. |
| 23:19 | Our cut behaviour, so if we look at this, cut until the pressure's OK which is what I would probably normally select. |
| 23:27 | Let's get a little bit more aggressive here, shutdown and a restart is required. |
| 23:31 | So, we do need to also be a little bit practical about this. |
| 23:35 | I mean obviously we want to protect the engine. |
| 23:37 | I've actually had an issue on the racetrack here, in our local racetrack, Highlands Motorsport Park, I was involved in a six or eight lap sprint race and this was in our Toyota 86 with the turbocharged FA20 engine in it. |
| 23:52 | And I think at the time we were possibly just a little bit low on oil level, obviously something that shouldn't happen but it still does from time to time. |
| 24:02 | This had a baffled sump but the FA20 does have some inherent problems with oil pressure control. |
| 24:10 | And at one point I came out of a hairpin corner which is quite a high lateral G corner, there was a McLaren 570S GT4 coming up behind me. |
| 24:21 | On corner exit we had a little bit of oil surge and of course the ECU did what it was told and cut power momentarily. |
| 24:29 | Of course the McLaren that was right on my tail expected me to smoothly accelerate out of the corner which is exactly what he was doing and that momentary, maybe half a second cut of power caught him by surprise and he actually clipped the corner of my rear bumper. |
| 24:46 | So, you do want to be very careful about protecting the engine, but also not putting yourself into a situation where you can't get out of the way of other drivers. |
| 24:54 | So, particularly for a racetrack application, I would be very careful about using a shutdown with a restart required. |
| 25:01 | Minimum runtime here, so 5 seconds. |
| 25:04 | The reason we want this is because if we start the engine, also depending on where abouts the oil pressure sensor is, we will find that it's going to take maybe a second or two seconds even for it to actually register good oil pressure. |
| 25:20 | So, if we've got this set to zero, it can in some instances actually prevent you starting the engine. |
| 25:26 | So, yeah 5 seconds is probably there or thereabouts what we need to have. |
| 25:29 | And again we've got this cut delay of one second. |
| 25:32 | I'm pretty adamant here that we do not want a delay for our oil pressure warning or our oil pressure safety strategy. |
| 25:42 | The instant that that oil pressure drops below where we want it to be or where we expect it to be, we want the ECU to cut power. |
| 25:50 | So, that is a very very easy way of basically making this oil pressure cut almost redundant or making it completely irrelevant if we've got a one second delay in there. |
| 26:02 | One second at 6000 RPM and maybe 150 kPa of positive boost pressure, that's going to very very quickly damage your engine, so be very mindful of your cut delay. |
| 26:14 | Then most importantly we've got our minimum oil pressure table. |
| 26:18 | So, we've got an RPM based table, this makes sense because if anyone has ever looked at the oil pressure versus RPM, you will see that our oil pressure is correlated to RPM, it's not a direct correlation necessarily, but as the RPM increases, the oil pump speeds up and we tend to see more oil pressure. |
| 26:40 | My general rule of thumb is I like to see about 10 psi of oil pressure per 1000 RPM. |
| 26:47 | So, at idle, 1000 RPM, I'd like to see at least 10 psi, probably more like 15 to 20, but there or thereabouts. |
| 26:55 | 3000 RPM, rule of thumb, about 30 psi and if we're up at 7000 or 8000 RPM, 70 to 80 psi. |
| 27:02 | So, that's kind of a bit of a guide. |
| 27:04 | The best way of actually figuring out what to do with this table though is to do some careful logging. |
| 27:10 | And this is something that also needs to be treated with a bit of care, because when we're on the dyno, generally we're not going to be getting the oil up to the sort of temperature that it's going to see on a racetrack in particular. |
| 27:22 | Less of an issue for a purely street driven car, but for a racecar this can be problematic. |
| 27:28 | Maybe on the dyno we get the oil up to maybe 80, 90, maybe even 100°C. |
| 27:34 | On the racetrack it wouldn't be uncommon to see that sort of up to 120 or 130°C. |
| 27:40 | The temperature of the oil affects the viscosity of the oil, thickness of the oil and that in turn can end up reducing or will end up reducing our oil pressure as the oil temperature comes up. |
| 27:54 | Where I am going with this, it's really easy to sit there on the dyno, log the oil pressure during a ramp run, look at the oil pressure trace and then maybe set your oil pressure cart maybe 5-10 psi below the actual oil pressure we're seeing. |
| 28:10 | Then the problem is you get out on the racetrack, do three or four laps, heat the oil up and the whole oil pressure drops. |
| 28:16 | So, it's really important to monitor realistic oil pressures under normal operating conditions and then set your threshold modestly below that so that you're not going to be running up against that cut unless you actually have oil surge occurring. |
| 28:30 | While you're doing this though, and this is something I'm always looking at when I'm monitoring my logging after a session on the racetrack, it's always good just to look through your oil pressure trace and see if you are noticing any spikes. |
| 28:45 | These will generally be under heavy cornering so you can correlate these to your lateral G force but in some instances you might see the oil pressure drop out under heavy braking or maybe heavy acceleration. |
| 28:58 | It's normally the cornering that does it. |
| 29:01 | Again case in point, my old drag car, we used to have a baffled sump on that, which did an absolutely outstanding job until the end of the drag strip where I would pull the boot and get on the brakes and clutch in, and we'd see the oil pressure drop from 80 or 90 psi down to about 20. |
| 29:21 | Less of an issue given that at the point this occurred, I'm completely off the throttle so the engine's not really producing power and clutched in, but still that might have started while the engine's still spinning over at 10 or 10500 RPM. |
| 29:35 | With that particular application, because of this and we couldn't sort it out any other way, I unfortunately had to go with a fairly expensive solution, which was a full dry sump system and that was rock solid but it is an expensive way of fixing low oil pressure, albeit less expensive than replacing your engine. |
| 29:54 | Alright we're going to move into some questions and answers shortly, so good time to just mention if you've got any questions on this topic, please ask those in the chat, we'll get into them in a moment. |
| 30:05 | But before we do that, let's just head back a little bit and we'll look at our warnings and our advanced warning output. |
| 30:11 | So, if we click on warnings here, this allows you to set warning levels for a range of these parameters: so RPM, manifold pressure, coolant temperature, lambda deviation and injector, duty cycle, EGT and high voltage. |
| 30:28 | So, basically it's a good idea to go through and just make sure that all of these values make sense and are set where you'd realistically like them. |
| 30:38 | That in and of itself isn't going to necessarily do anything but that's where we work in conjunction with our advanced warning output. |
| 30:46 | So, we need to for a start enable this. |
| 30:50 | And then we've got our output mode, essentially what is going to happen. |
| 30:53 | So, in this case we've got the ability to have a separate constant output per level or a flash at level one and a constant at level two. |
| 31:03 | So, basically we can hook this up to a dry ball warning light or something of that nature and basically bring this to the driver's attention. |
| 31:11 | We've got used channels here and then we've got our check engine light codes, we can enable or disable those. |
| 31:19 | And then we've got the load conditions used for warnings during load. |
| 31:23 | So, basically we can set these up so that these warnings will only come in under certain conditions, basically making sure that the warnings don't end up just irritating us when we don't need them. |
| 31:34 | And then we've got what we actually want to happen here. |
| 31:37 | So, engine power cut when at level two. |
| 31:39 | This is disabled but we can of course enable this. |
| 31:43 | And again we've got the usual parameters we've already seen here, we've got a cut delay, we've got an RPM and a throttle position threshold and a minimum engine runtime. |
| 31:55 | So, then we've got our warning channels. |
| 31:57 | So, what we're actually going to do with these warnings. |
| 32:01 | So, a lot of flexibility there to set this up to basically warn the driver or protect the engine and we don't have to really be thinking about this while we're out on the track. |
| 32:11 | So, there are a range of other parameters here, we've also got the ability to have general purpose RPM limits. |
| 32:19 | So, these were quite often used for the likes, actually I've got one set up here I think, general purpose limit at one. |
| 32:27 | So, this is another way, and I mentioned that there's a variety of different ways of achieving the same aim. |
| 32:35 | We've already seen that the MaxxECU incorporates its own dedicated oil pressure cut. |
| 32:41 | But typically, or another way of doing this on ECUs that don't have that feature is just to use a general purpose RPM limiter. |
| 32:47 | And that's what this table here is. |
| 32:50 | You can see that what it's going to do is cut fuel and on, whoops let's try and get rid of that, bring it back in. |
| 32:59 | The vertical axis here is our analog voltage input six which is our oil pressure sensor. |
| 33:05 | Goes without saying, obviously if you want to use an oil pressure protection strategy, it is going to require a oil pressure sensor. |
| 33:14 | Not very expensive, pretty easy to fit and I kind of have almost as a non negotiable now with the cars that I tune, that they're going to have an oil pressure sensor, a fuel pressure sensor and onboard lambda. |
| 33:29 | There's just no real good reason not to have those these days and these sensors are relatively cheap. |
| 33:37 | Then what we've got here is our RPM axis on the X axis and this table which is set up very very crude at the moment but basically you can see that everywhere with 9500 RPM, it's set above the actual engine RPM limiter so it's basically just out of the way. |
| 33:54 | Essentially the general purpose limiting table is going to do nothing. |
| 33:58 | When we're below that red line that I just drew in, the RPM limit is zero so basically if the oil pressure drops down below that level, it's going to cut and then we can just adjust the break points and the values in that table in order to achieve our desired aims. |
| 34:16 | We've got three of those general purpose limiter tables and we've also got some user cut tables, I can't think off the top of my head of a real good case study for why I'd want to use a user cut table, but they are there if you require. |
| 34:31 | Alright pretty straightforward strategies but really nice how Maxx have incorporated these, making them really really easy to adjust and achieve the sort of results we want or need. |
| 34:43 | I'll head over now and have a look and see what questions we've got and if you do have any more questions, please keep those coming. |
| 34:51 | John has asked, "Are there any aftermarket ECUs that use a torque model instead of throttle position versus map for lean power cut like OEM?" Great question. |
| 35:07 | I don't know. |
| 35:09 | Nothing that springs to mind. |
| 35:11 | There are plenty of aftermarket ECUs, plenty's probably a bit of an exaggeration, there are aftermarket ECUs that use a torque model, and whether that incorporates lean power cut, I'm not too sure if I can come up with one, sorry. |
| 35:29 | Just different ways of basically achieving the same aim though and everything I just talked about in the Maxx is going to be very effective for achieving that. |
| 35:40 | I think as well what we do need to keep in mind is that the aftermarket ECU world are kind of trying to find the best fit compromise to suit the tune up market. |
| 35:51 | And what I mean by that is there are some really really complex strategies used in the OEM world for controlling the engine output and all of the engine functionality, and getting great results and this becomes increasingly complicated and essential as the likes of emissions compliance becomes more critical or tightly controlled. |
| 36:12 | We want absolutely tight control over the fuelling and the ignition control for the engine. |
| 36:19 | But the problem with this is as these strategies become more and more complex, it becomes harder and harder for the average tuner to just simply tune the ECU. |
| 36:27 | So, these aftermarket ECU manufacturers are trying to walk this tightrope of getting really good control over the engine, but while still giving us in the enthusiast market tools that aren't going to require a four year engineering degree in order to actually be able to tune. |
| 36:42 | So, yeah a little off your topic specifically, but that's why you're not always going to see OEM like strategies in the aftermarket ECU world. |
| 36:52 | Well that's all the questions we've got, obviously I explained everything perfectly and everyone understands everything, which is ideal. |
| 36:59 | As usual though, if you do have questions after this webinar has aired live, if you're watching this in the archive, please ask those questions in the chat and I'll be happy to answer them there. |
| 37:09 | Thanks for watching and hopefully we'll see you all next week. |


