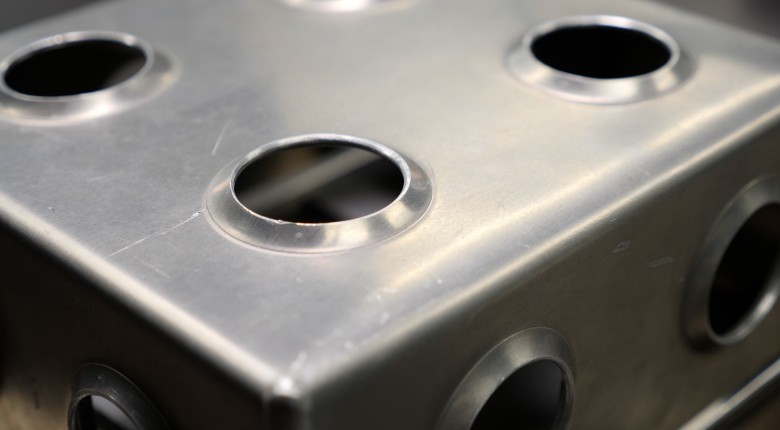
Sheetmetal has many different uses in motorsport fabrication, and in our constant battle of weight vs strength it is essentially a standard sight to see hole, or a flock of them, drilled through the material to remove weight. But what about the strength that is lost doing this?
Dimple dies are the answer with the flared lip they create giving us back both strength and rigidity in our material, and there are a few different styles and ways they can be implemented according to budget and frequency of use.
The first and arguably more common way for those of us starting out with dimple dies is by using a holesaw to cut our required size hole, and then using our dimple die to flare it. The downside to this method is that a holesaw can lack a little precision, especially when we go to larger and larger sizes using cheap kits. The inaccuracy is then amplified when we require many holes in one piece and can leave us having a hole too big for our intended die in extreme cases.
An alternative option is to use a hole punch which gives us a much tidier and more accurate hole, and for those with the volume to justify it, a flared punch can be a solid investment as it allows the user to both punch and flare the hole at the same time.
For smaller holes the likes of a step drill can also be used making the process relatively quick and easy once we have taken the time to correctly space and mark our holes out.
When it comes to physically flaring our hole, a hydraulic press really is going to make life easier but in some cases depending on the size of our hole and material we can get away with using a solid bench vice to use our dimple die. No matter which method you use it is important not to over press/tighten the die, especially when using softer metals like aluminum, as this can leave blemishes that are difficult or impossible to remove.
While we don't need every tool in existence for every specific task, sometimes having the right tool on hand will quickly pay for itself when it comes to saving time, giving repeatable results meaning you're less likely to waste materials
TIME STAMPS:
0:00 - Lesson Plan
0:10 - Dimple Die Anatomy
0:25 - Flare Styles and Purpose
0:49 - How To Use Dimple Dies - 3 Main Options
1:40 - Hole Saw Example
2:13 - Make Sure You Do A Quick Sanity Check
2:24 - Hydraulic Press or Bench Vice
2:46 - How To Know When It's Done
3:10 - Punch and Flare Tool
4:38 - IMPORTANT: Calculate your Spacing FIRST
4:50 - Just ONE of Many Modules
This is just ONE module from the full Fabrication Fundamentals course.


Comments
No one has commented on this page yet.