Drilling holes is something you're going to be spending a lot of time doing when fabricating parts for your car. On face value it seems like a simple enough task and it can be, however it's also an area that we repeatedly see people make avoidable mistakes. These mistakes can affect the quality and accuracy of our holes and just as easily destroy our drill bits.
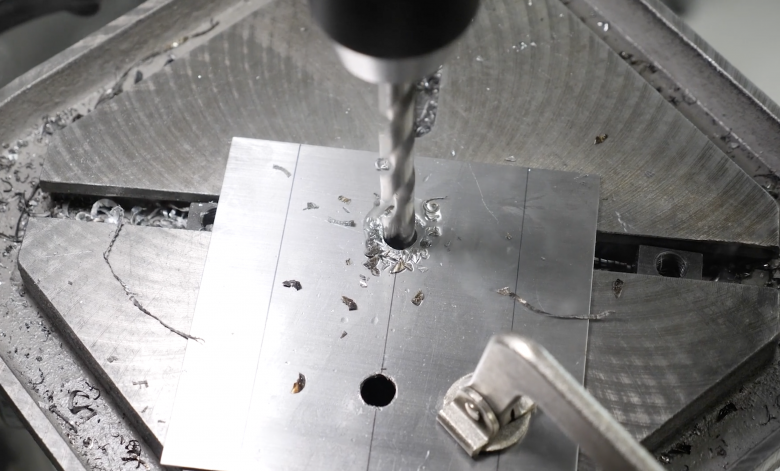
In this example, we'll look at using both a cordless battery drill and a drill press to drill holes. As we learned in the tools section of the Motorsport Fabrication Fundamentals course, each style of drill has its own advantages and disadvantages.
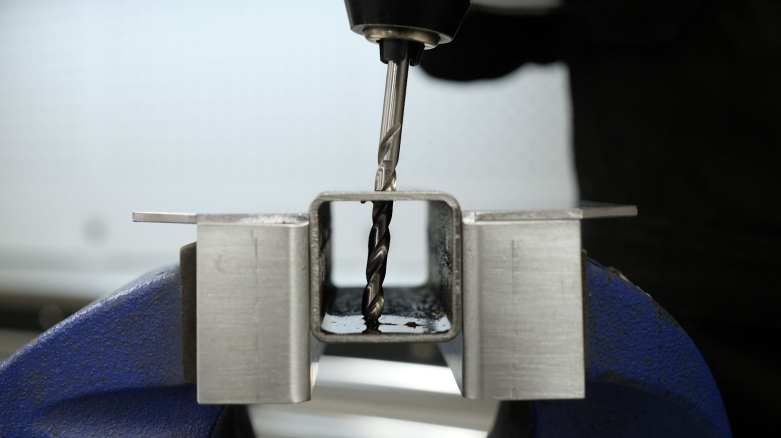
A battery drill is very portable but it can be tricky to ensure your hole is being drilled exactly perpendicular to the workpiece and it can also be easy for your drill to wander, affecting the accuracy of the location of your finished hole. The drill press on the other hand offers us a lot more control over the drilling speed as well as the ability to hold the workpiece securely in a drill vice. Of course it's not always possible or practical to use a drill press so we really need to understand how to use both tools correctly.
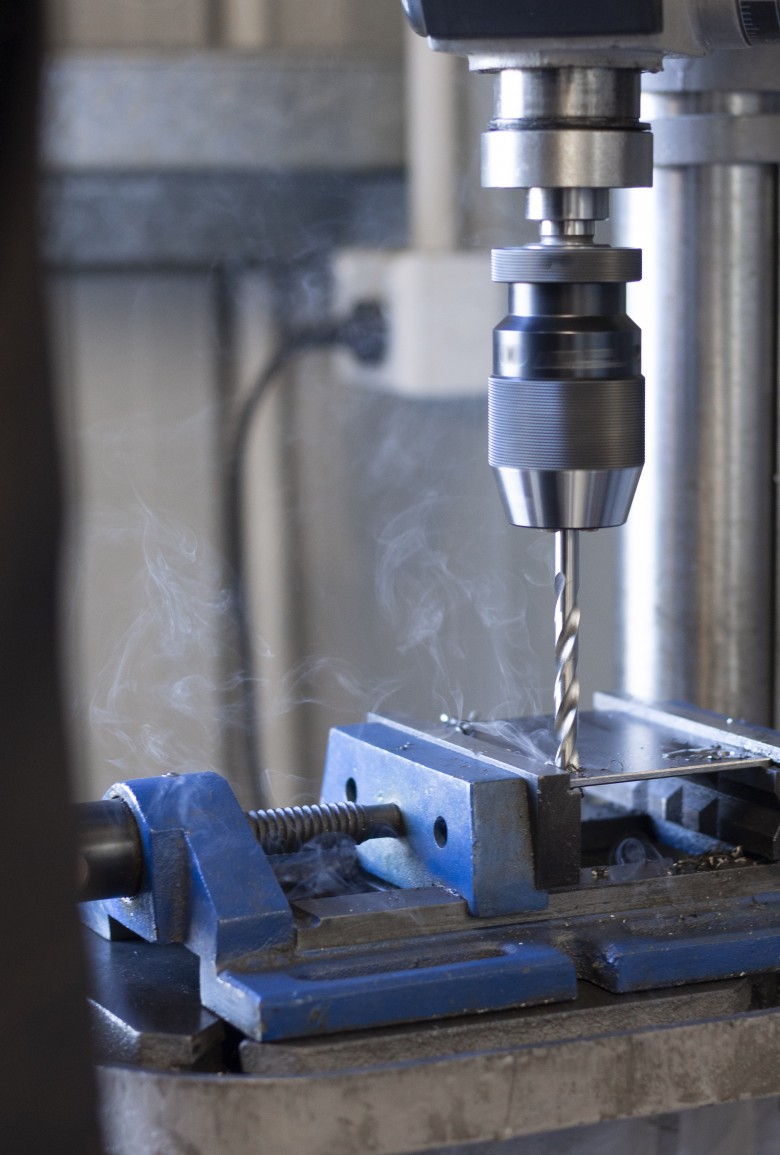
Before we jump into drilling our holes, first off we need to consider the material we're drilling as well as the size of the drill bit. These two aspects will then define the correct speed to set our drill to. Drilling too fast for the material will quickly dull your drill bit and also creates a lot of heat which then can harden the surface of some materials, making it even harder to drill.
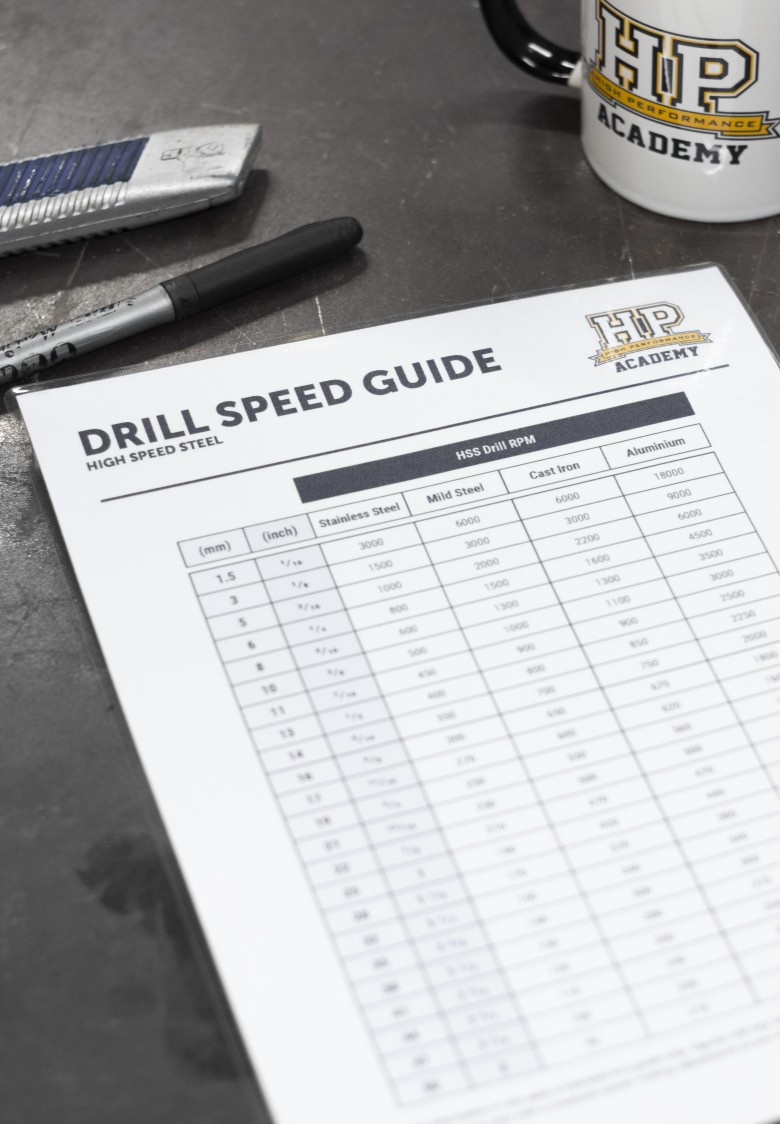
We've previously discussed drilling speeds separately where we included a drilling speed chart that we recommend you print out and place near your drill. We also recommend using a cutting oil or lubricant when drilling holes as this helps provide a cleaner and more accurate hole as well as extending the life of your drill bits. A suitable lubricant will be available from any machinery suppliers or automotive supply stores and we're using a product called Cutmax 226 which we purchase in bulk as we also use it for machining operations. The lubricant is then decanted into smaller bottles or containers as required for our various tasks. Alternatively, you can purchase lubricant in an aerosol can which is more convenient for smaller jobs.
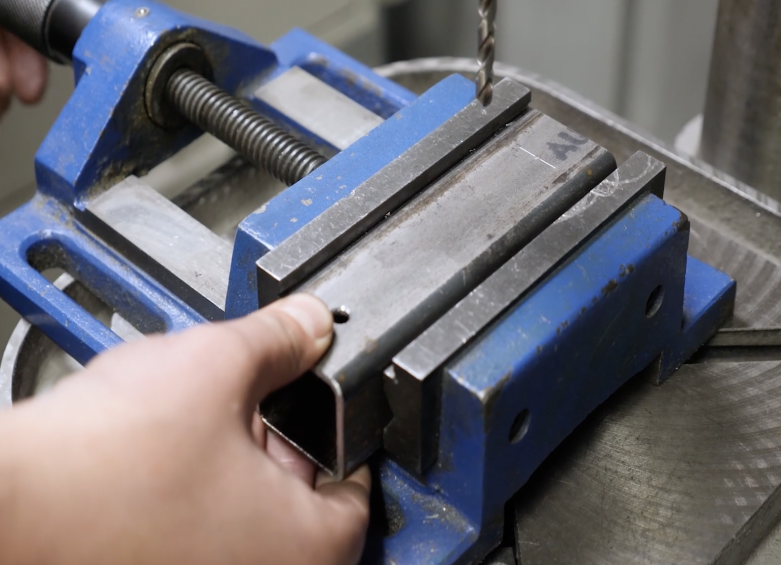
For our first demonstration, I'm going to use a cordless drill and it's important to make sure your workpiece is well supported. Often you'll be drilling a part on a chassis so this isn't an issue, however for smaller brackets or components, it's a good idea to support the part you're drilling in a vice. It can be tempting to skip this part but if the drill bit grabs the part you're drilling and spins with the drill, this can easily result in a nasty cut to your hand or perhaps even worse.
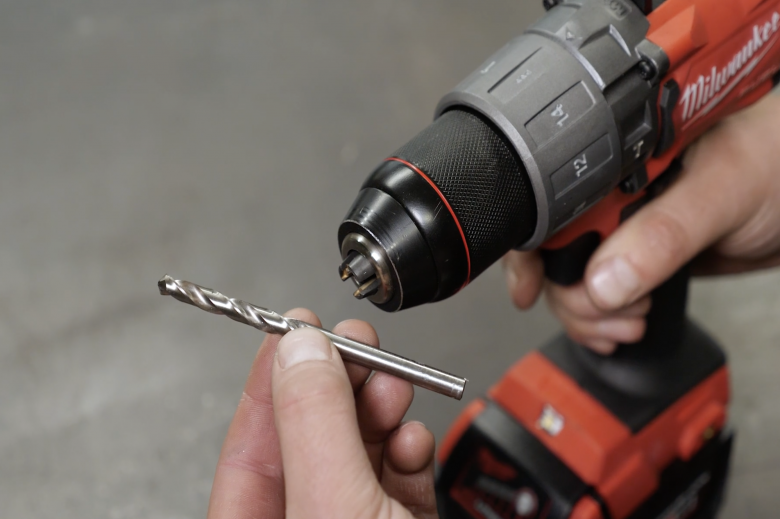
What we're going to do is drill a 6 mm hole in a piece of mild steel and from our drill speed chart we can see that this gives us a recommended drilling speed of about 1600 RPM. With a battery drill, we don't often have such specific control of the drilling speed and more often than not, we'll only have a low or a high speed option, although some drills will also vary the drilling speed depending exactly how far we depress the trigger. A drilling speed of 1600 RPM is quite high so we'll be selecting the high speed setting.
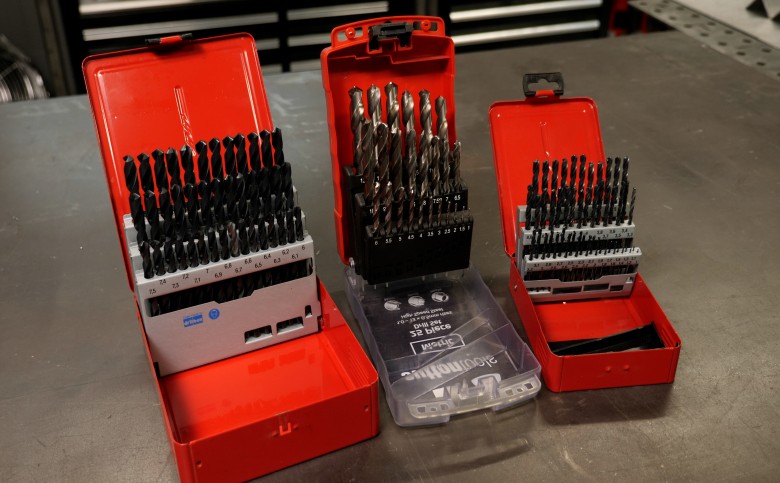
We do need to also consider that we may not be able to drill our hole in one go and if your drill size is approximately 6 mm or larger, then you're going to be best to start by drilling a smaller pilot hole first. Keep in mind that steps in drill size aren't set in stone and this will come down to a little trial and error as well as the material you're working with. For example, 6 mm is about as large as we'd recommend drilling without a pilot hole so with this size drill, you could complete the hole in one go, however using a pilot drill will provide a little more accuracy to the finished hole and it reduces the chances of your drill bit wandering. The downside of course is this takes more time as there's two separate operations.
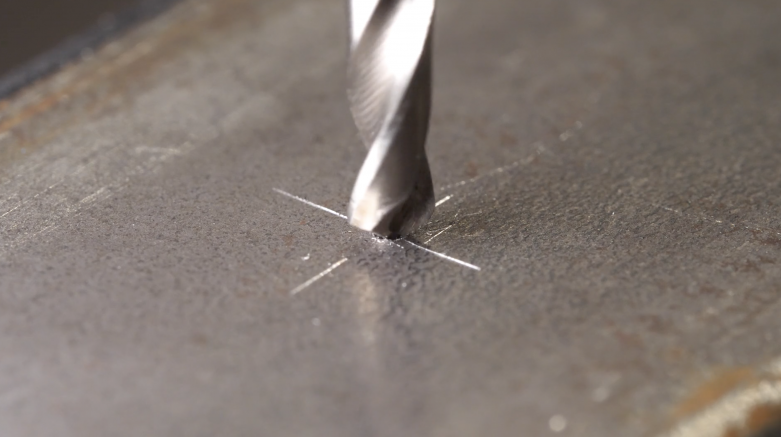
In this example, we're going to start with a 3 mm pilot drill bit and then step up in size. In our case of course, the next drill we'd select is our finished size of 6 mm. Let's assume however, we wanted to drill a 13 mm diameter hole. In this case we'd recommend starting with a 3 mm drill bit and then stepping up to an 8 or 9 mm drill bit before finally stepping to the finished size of 13 mm. What we want to do here is step up the drill in relatively even increments. We already checked the recommended speed for the 6 mm drill but since we're using a 3 mm pilot, we obviously need to check this too. In this case, it's not really relevant with our 2 speed hand drill since we're already using high speed but we can see that the RPM should be 3200 which still matches the high speed setting.
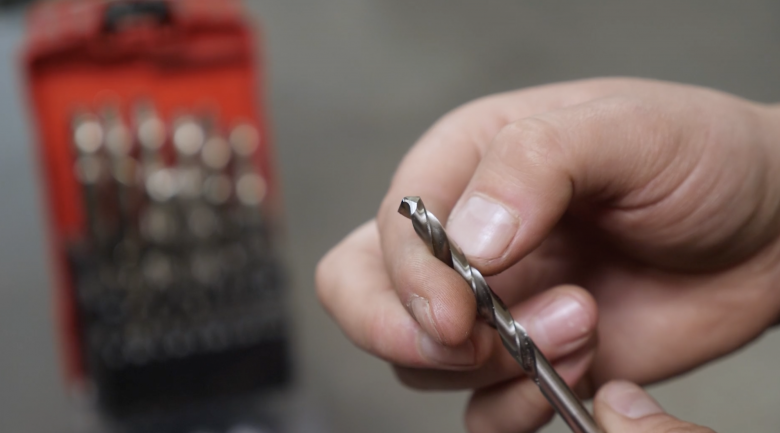
Before securing your drill bit in the chuck of the drill and tightening it, we also want to inspect the end of the drill, looking for any sign that the drill is blunt, discoloured from excessive heat or otherwise damaged. If you've got any concerns about the condition of the drill bit then you can replace it or check the module on sharpening drill bits later in this section. It's important to ensure that you tighten the chuck as tightly as possible, since if the drill bit slips in the chuck, this can damage both the drill bit and the chuck.

It's worth mentioning our PPE here too. Drilling is a relatively safe operation however we do want to make sure that we've got no loose clothing or exposed long hair that could inadvertently get drawn into our drill. Admittedly this is more of a consideration with a drill press than a hand drill though. It's also always advisable to wear safety glasses as the drilling operation can result in sharp metal swarf being ejected from the drill bit which could easily make it into your eyes.
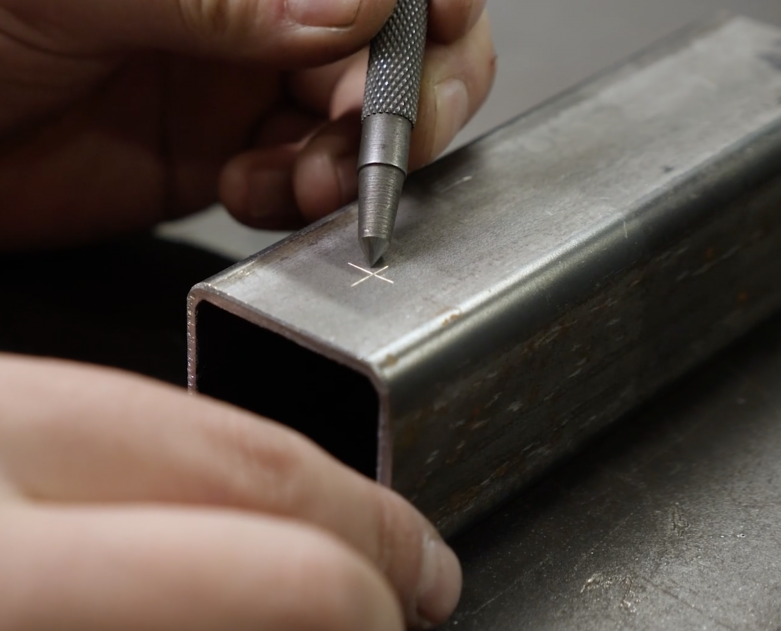
With our drill ready to go, we have one last task which is to use a centre punch to produce an indent which we can then centre our drill bit on. This helps improve the accuracy of the hole location and means there's no chance of the drill bit wandering around. This requires us to accurately locate the centre punch where we've marked out our hole and then simply give it a light tap with a hammer. This is a pretty simple operation but you do need to be a little careful how hard you hit the centre punch with unsupported areas of thin sheet metal as this can end up inadvertently denting or deforming the material. All we're looking for is a small sharp mark on the workpiece which will allow the drill bit to be located accurately. This is another reason why a small diameter pilot drill can be beneficial. In our example, the 3 mm pilot drill locates nicely into the mark from the centre punch. If we went straight to the 6 mm drill, it's more likely to wander from the punch mark due to the diameter of the tip of the drill bit.
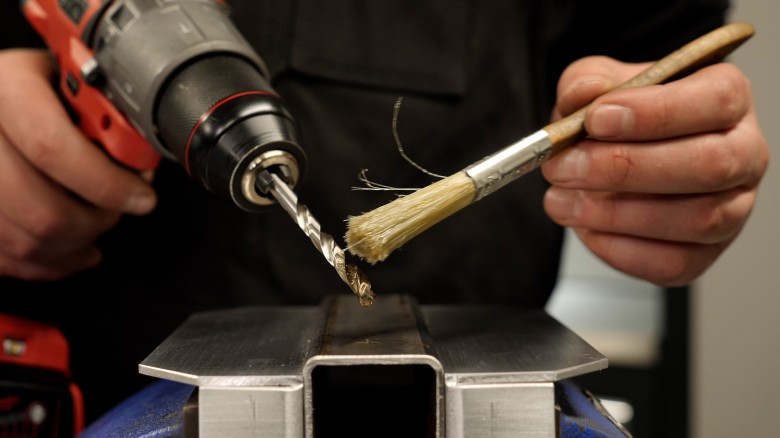
The final part of the preparation is to apply a generous amount of cutting oil to the drill bit as well as the workpiece. For deeper holes you'll also need to stop and reapply cutting oil multiple times during the drilling process. We also want to make sure that we're standing in a stable and supported stance during the drilling process to make sure that we don't lose our balance when the drill bit breaks through the other side of the workpiece.
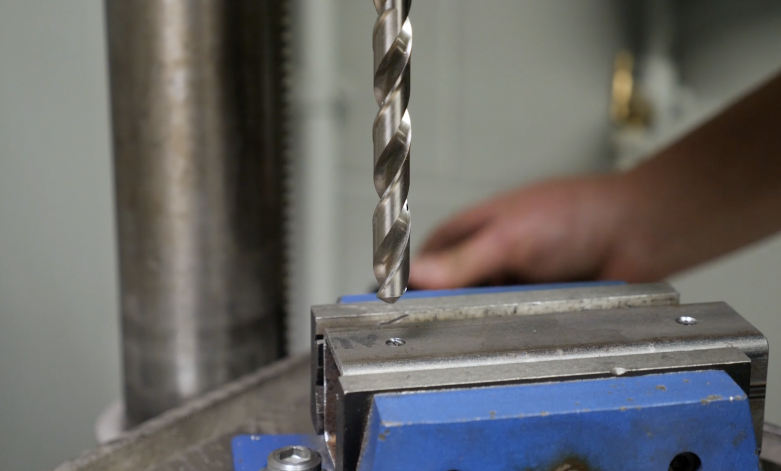
Now we can start drilling our hole which simply requires us to apply a light amount of pressure to the drill. We don't need to force the drill bit here and instead we want to let the drill bit do the work for us. One of the most common mistakes novices make is trying to force the drill which can easily damage or break the drill bit as well as putting undue stress and strain on your hand drill. During the drilling process, we need to take special care to ensure that the drill bit stays as close as possible to 90° to the work piece. This is more important as we start drilling through thicker materials as there's more of a chance of introducing an angle to the hole.
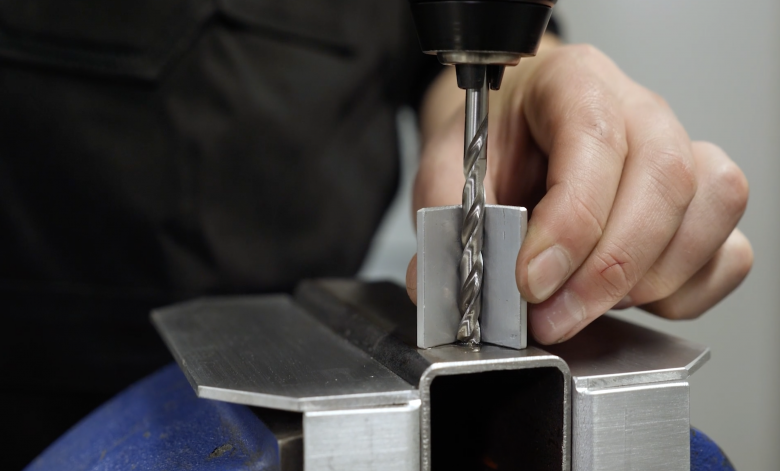
A technique you can use here is to use a piece of cut off right angle and place this on the work surface and use this as a reference. This will allow you to check that your drill bit is perpendicular in two planes simultaneously. With our pilot hole drilled we can now swap to our 6 mm drill bit and repeat the exact same process. You'll find that as we step up in drill size, the drill tends to naturally track down the pilot hole so it's easier to ensure that the hole remains perpendicular to the surface. Once we've finished drilling our hole, we need to deburr it to remove any sharp edges. This can be done by simply running a deburring tool around the inside of the hole on both sides of the material or alternatively we can use a counter sink drill bit to achieve the same effect.
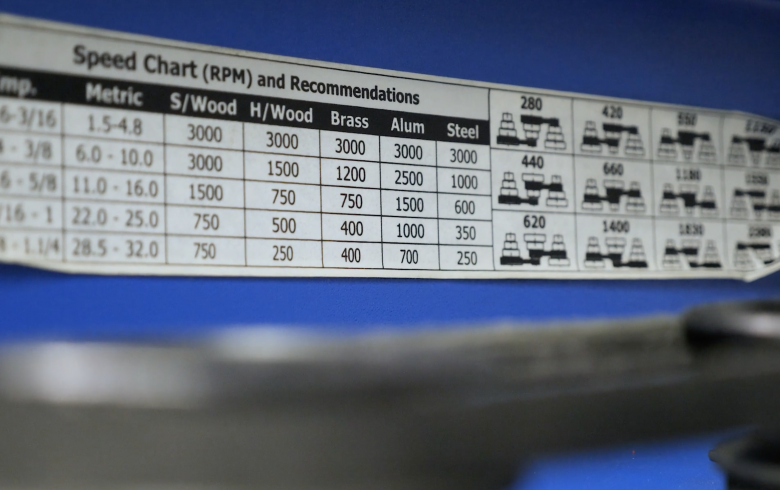
Let's move on and take a look at using the drill press and for this demonstration we'll drill a larger 12 mm hole in the same material. Changing the drill speed in a pedestal drill is achieved by changing the location of the drive belts on the various pulleys and there will be a guide or chart on your drill press to let you know which combination is needed for each specific speed. There are two different styles of chuck you'll come across on a drill press.
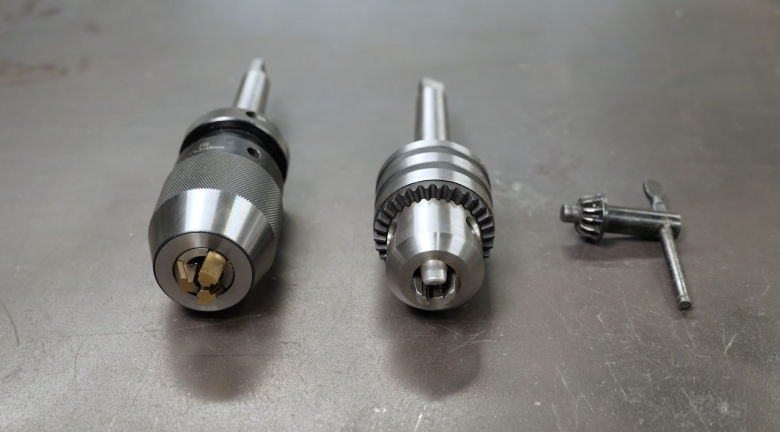
The first is a conventional chuck which uses a key to tighten it. Just like the hand drill, it's important to make sure that the chuck is as tight as you can get it to avoid slipping. In our case, we've got what is referred to as a keyless chuck. These have the advantage of being easier to tighten and loosen by hand and due to the design of the chuck they naturally tighten in operation, making slippage of the drill bit much less likely. Since the drill press ensures we're drilling perpendicular to the workpiece and the chuck supports the drill more accurately than our hand drill, we don't necessarily need to start with a small pilot drill as we did with the hand drill. A good rule of thumb is to start with a pilot about half the size of our final hole size which in this case of course is 6 mm.
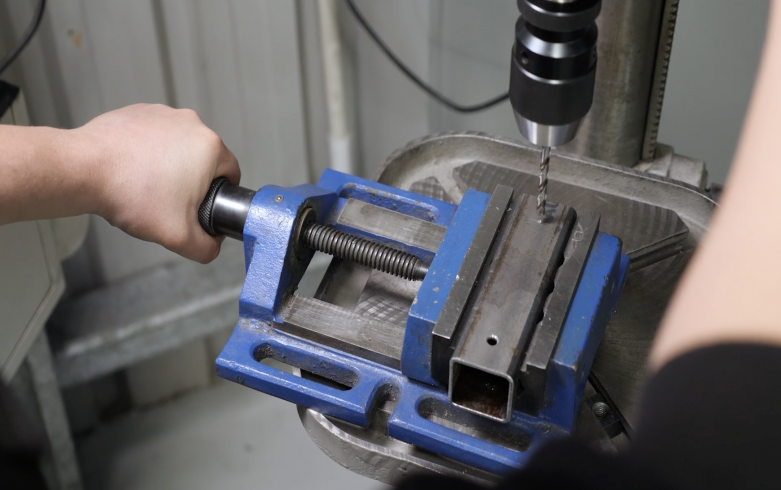
One of the biggest dangers of using a pedestal drill is not supporting the workpiece properly. A lot of novice fabricators may be tempted to hold the part by hand while drilling holes but all it takes is for the drill bit to grab and it can pull the workpiece out of your hand and start spinning around. This is made more dangerous because of the extra torque available compared to a regular battery drill. To prevent this, always clamp the part you want to drill in a drilling vice. It's usually sufficient to then support the drilling vice by hand on the drill base however it can be clamped down for absolutely safety and security. It also pays to familiarise yourself with the emergency stop function on your drill press. This will usually be obvious and easily accessible and is easy to hit in case of an emergency to shut the drill down.
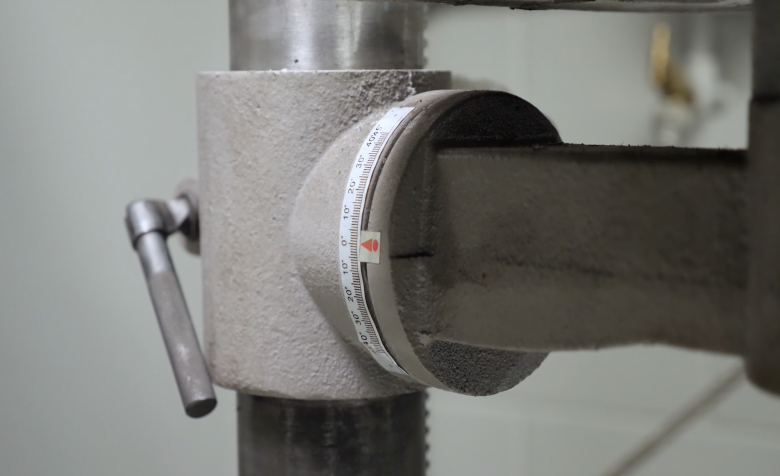
The process of drilling using a pedestal drill is not much different than what we just looked at however this time we don't need to be concerned about controlling the angle of the hole as this is set by the base plate on the pedestal drill. It is worth mentioning though that the base plate angle can be adjusted if desired so it's always a good idea to start by making sure that the angle is in fact where you want it to be before starting out. We also want to adjust the height of the workpiece versus the drill so that we can drill to our desired depth in one shot. This is more relevant for deeper holes but we generally want to avoid working at the full extension of the drill press as this can allow more flex in the drill bit.
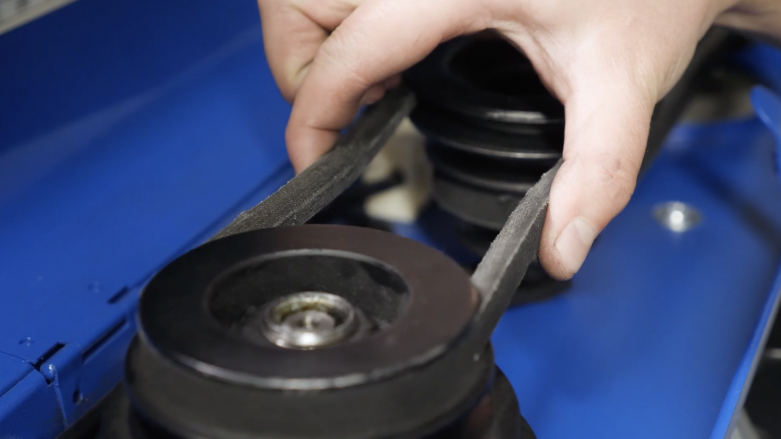
We already know that the drilling speed for a 6 mm hole in mild steel is 1600 RPM so we can refer to the guide on our drill press and set the drive pulleys accordingly. We're not always going to be able to perfectly match the calculated drilling speed in which case we'll choose the closest speed below our target speed and in our case that's 1550 RPM. It's important to make sure that the belts are tensioned properly after adjusting the drill speed, otherwise the full torque won't be transferred to the drill bit and instead the belts will slip. Tensioning the belts properly is something that comes with experience and it's not too tricky. However as a rough guide, when properly tensioned, you should be able to achieve a deflection of about 10 to 15 mm if you squeeze the belts together with moderate pressure. A hint that you don't have sufficient tension is a high pitched squeal being emitted from the pulleys or the chuck jamming entirely during drilling.
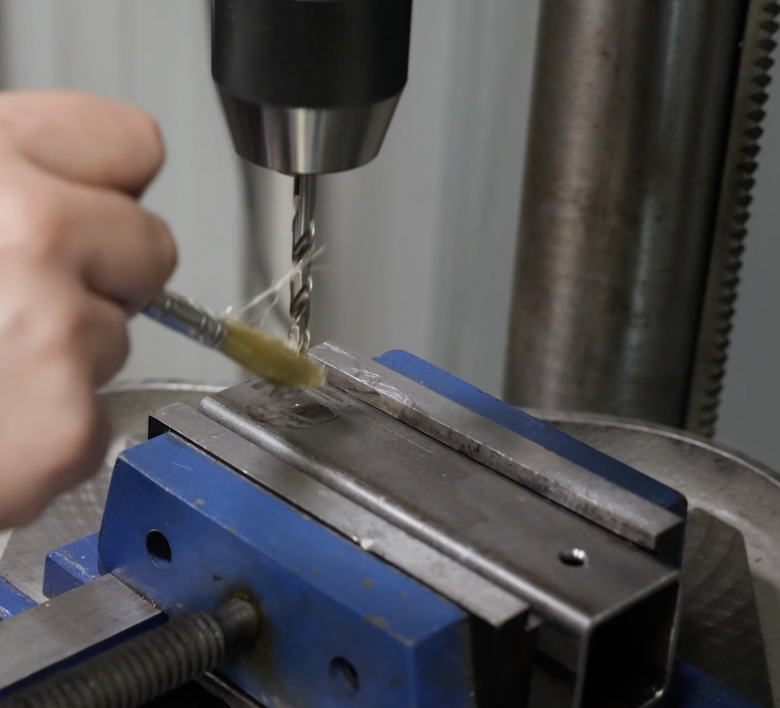
We can now apply cutting lubricant to the drill bit and our workpiece and turn on the drill press. The drilling process simply requires us to turn the handle on the drill press to lower the drill into our workpiece. Initially a little care needs to be taken in order to ensure that we are in fact aligned properly on our centre punch mark. Once we're confident that the drill bit is properly located, we can apply light pressure, again allowing the drill bit to do the work drilling through the material. As with the cordless drill, the common mistake here is to force the drill. Light pressure is all that should be required with a properly sharpened drill bit. Once we've drilled our pilot hole we can change drill bits and adjust the drill speed to suit our 12 mm drill bit.
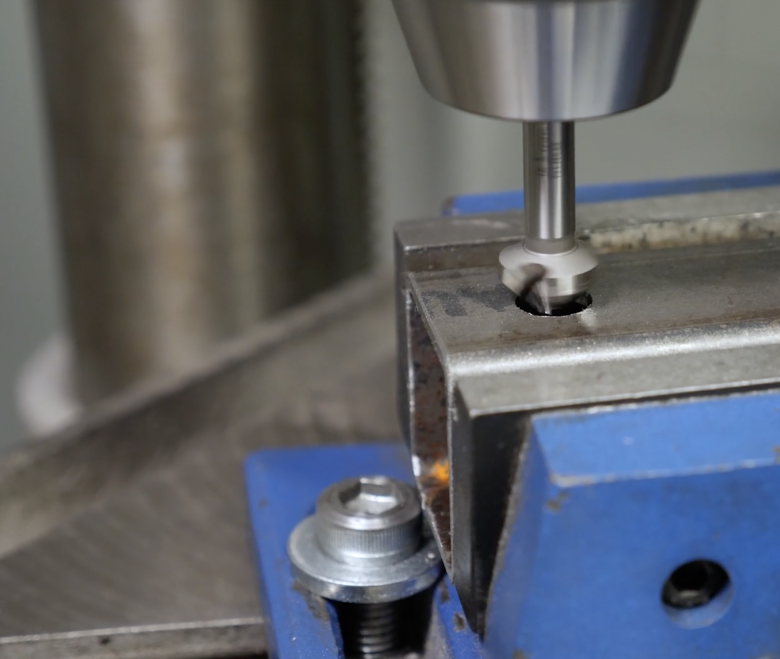
From our speed chart, we can see that the drill speed should be 800 RPM. Our drill press doesn't allow us to set a speed of 800 and the closest speed that's below this is 660. We can make the necessary adjustments to the drive pulleys to achieve this, again ensuring the belts are nice and tight. We can now repeat the process and complete our hole. Remember that for deeper holes we may need to stop and reapply cutting lubricant multiple times. As with our cordless drill, we'll still need to deburr the finished hole and the process is identical, either using a deburring tool or a counter sink drill bit in the drill press.
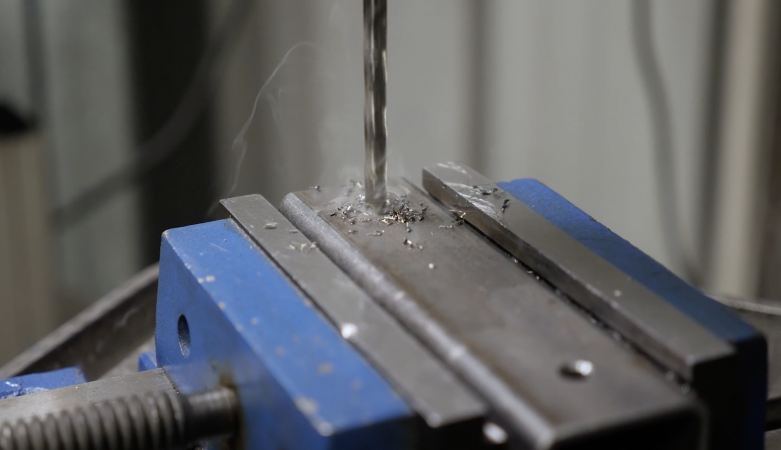
As we've discussed already, drilling speed is critical to the quality of your finished hole as well as the life expectancy of your drill bits. When you're just getting started though, you're not going to necessarily know if you're drilling material too fast but there are some good clues that you can keep an eye out for. The first of these is when the cutting oil gets too hot and you'll know this because the oil will start producing thick white smoke as you're drilling. This is a sign you should stop and slow down the cutting speed but there's a pretty good chance your drill bit will also need to be resharpened. The other clue is when you progress through the part and your drilling speed slow down and you're finding you need to apply excessive force to the drill in order to continue moving through the workpiece. Drilling shouldn't require a lot of effort and instead, we're letting the drill bit do the work for us as we've already explained.
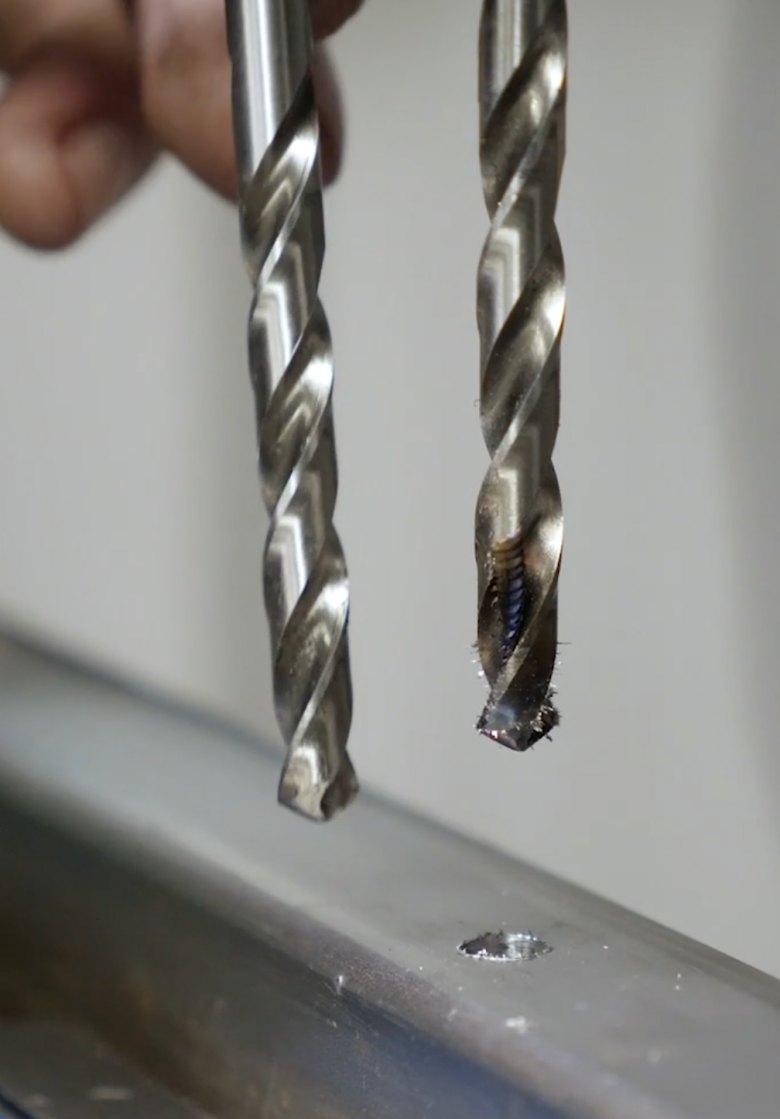
If you're noticing any of these telltale signs, you'll likely also find that the tip of the drill bit will be showing signs that it is getting hot. This will initially start with a light brown discolouration near the tip and if you continue to ignore the warning signs, this will end up with the drill bit turning blue. At this point the drill bit will require resharpening, however if the tip has turned blue, you'll likely find the drill bit will go blunt again very quickly. The solution is either to replace the drill bit or cut off the end and resharpen it.
And there you have it! While simply drilling a hole is more simple than it might appear when you lay it all out like this, like anything there is a right and wrong way to get the job done. With it also being such a basic staple in our fabrication skillset it's also something that can lead to causing big headaches down the line as if you can't get the small stuff right, you have no chance when it comes to more complicated tasks that depend on this later in the fabrication process!

If you want to learn more and see this plus many other topics in video form, check out the fabrication fundamentals course now. You can start learning instantly, and you keep the course for LIFE.
